Help Toolbar (select a button to browse other online help sections) Home Tutorials Resources Search Tabs & Menus Button Bar Table & Data Display |
Reporting - Creating a Historical Report with Custom Date Ranges
eNETEmployer reports can be based on the current pay cycle or historical pay cycles that have already been closed. The default setting for all reports is the most recently calculated cycle (whether open or closed). This default ensures that you are presented with current information without having to adjust any report settings.
Each report is unique and comes with a pre-defined set of applicable options. Based on the requirements and purpose for the report, some will allow you to modify many of the columns in the table. Other reports may only provide a few user-definable options and will therefore have a limited amount of editable options.
Use the following tutorial to learn how access the Reports screen, to create a basic report, and to apply custom report settings.
Employee User Accounts - If you have an employee account, you can still use the instructions below to create historical reports and pay statements. The only difference is that your report options will be found under your User menu as opposed to the Reports screen as shown in this tutorial. |
NOTE: Click on an image below to view it at full size.
To Create Historical Reports:
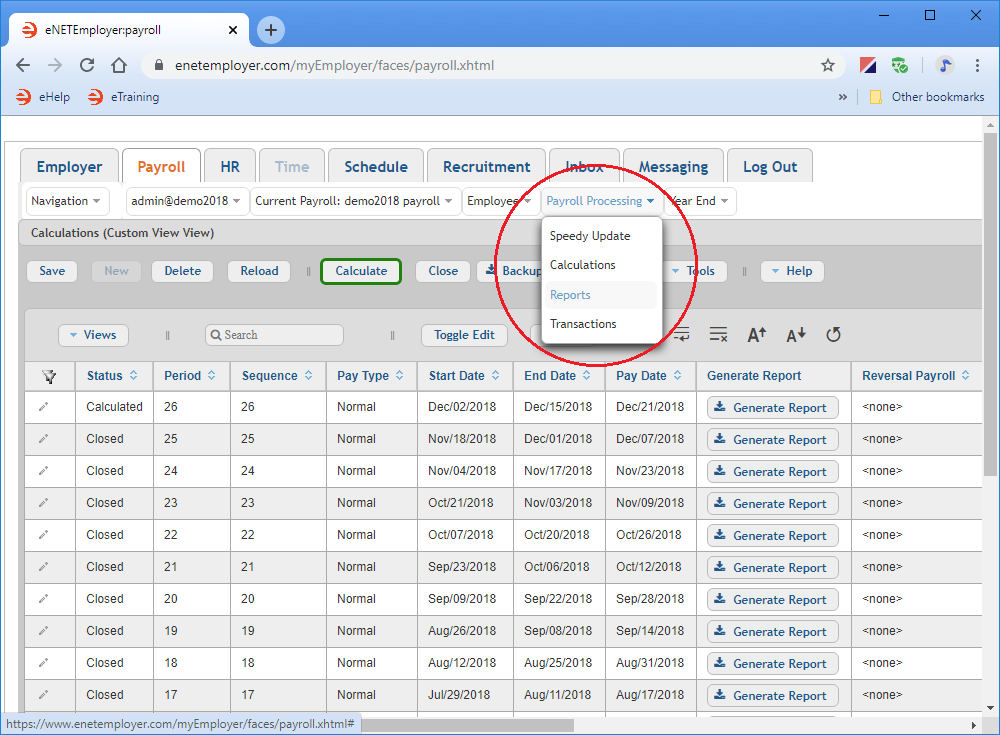
- Open the Payroll module and select the Payroll Processing menu to view the available options.
- Choose the Reports option from the menu. This opens the Payroll Processing - Reports screen where you can work with all aspects of program reporting including viewing, printing, and exporting.
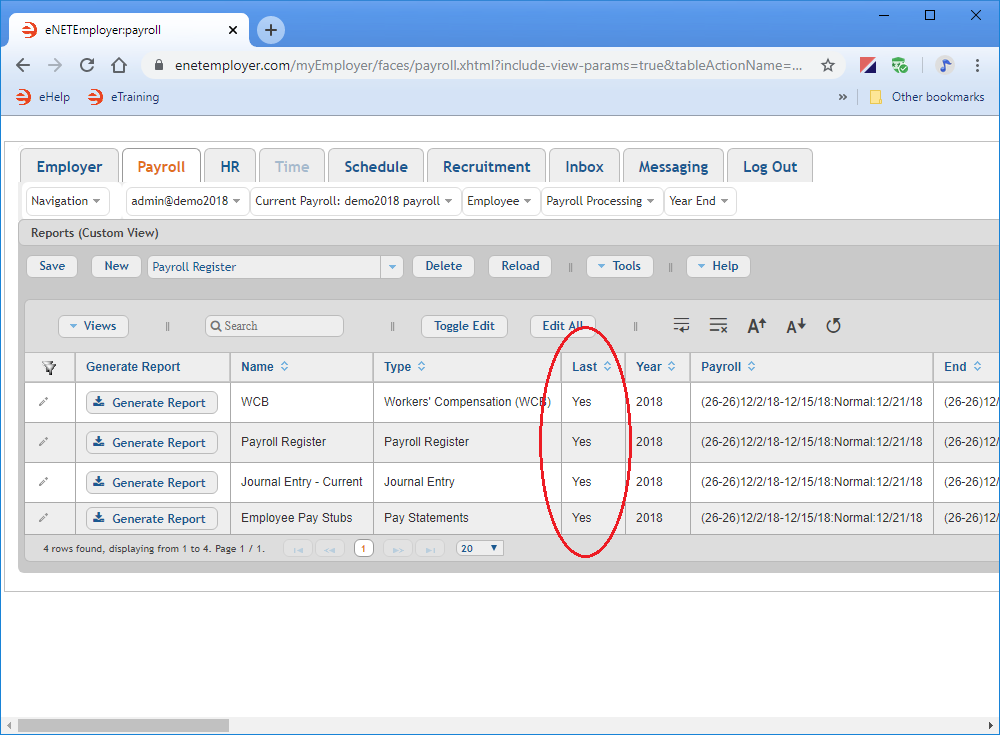
- Move to the column that is entitled "Last" and you will notice that the default setting is set to "Yes". This setting means that the report will be created based on the last calculated pay cycle. This is indicated by the check mark that appears in the Last checkbox. We will now change this setting for all of our reports.
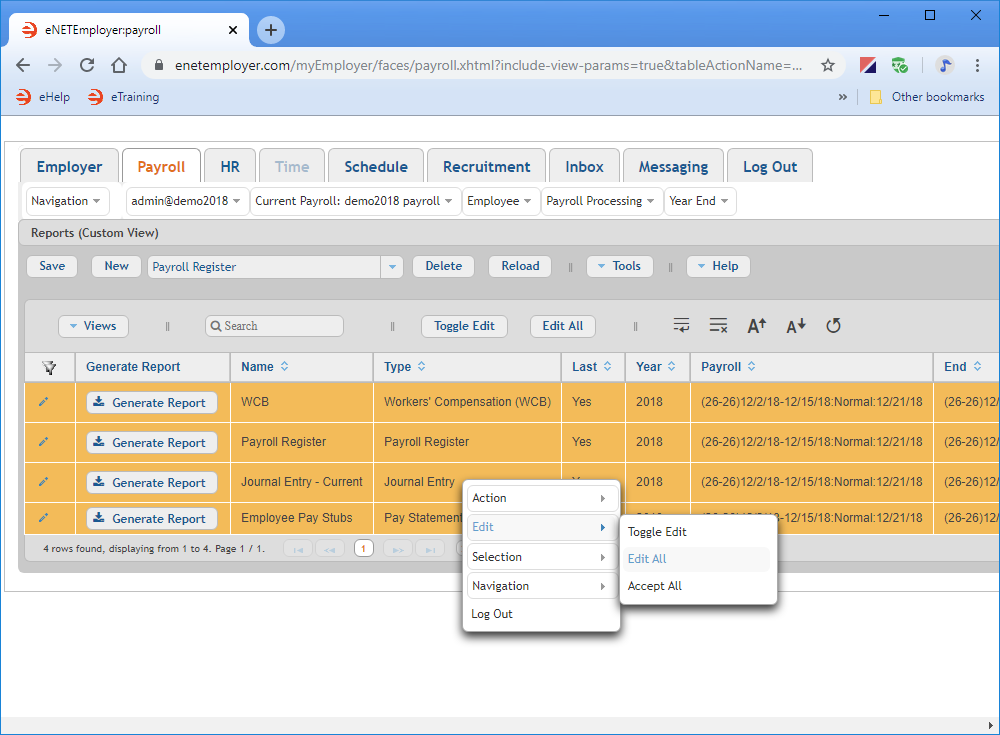
- Highlight all of the report rows, then choose the Toggle Edit button from the button bar. You can also right-click the mouse on one of the highlighted report rows and choose the Edit - Toggle Edit menu command (see below). This action changes each highlighted row to Edit Mode so that you can modify the default settings.
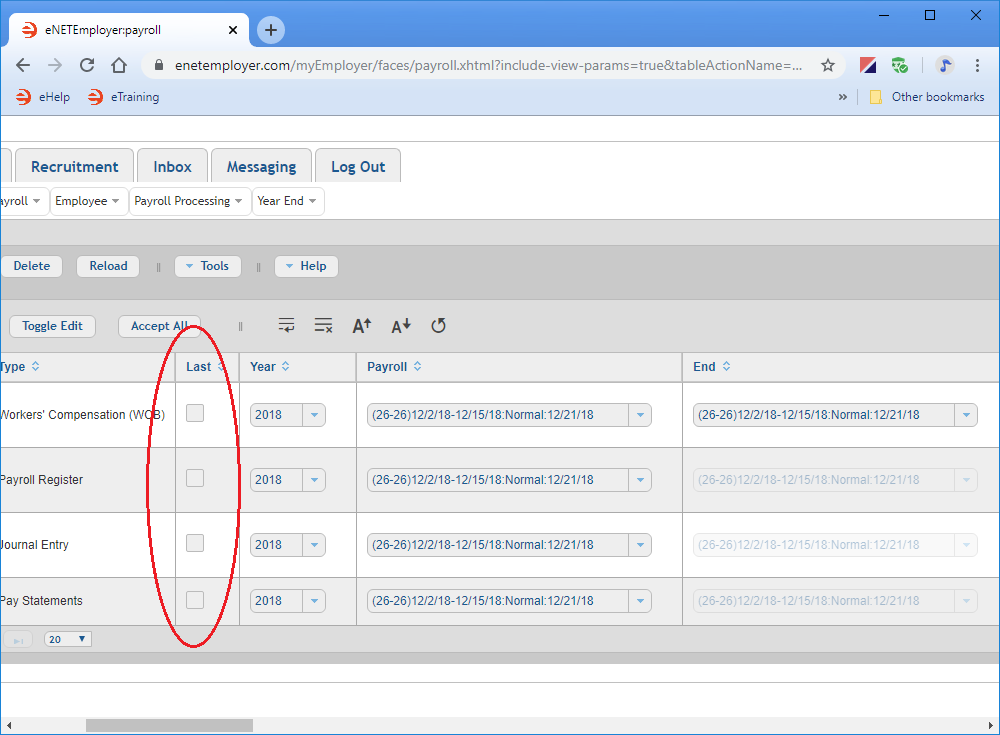
- Move to the Last column for every row and remove the check by clicking inside the box.
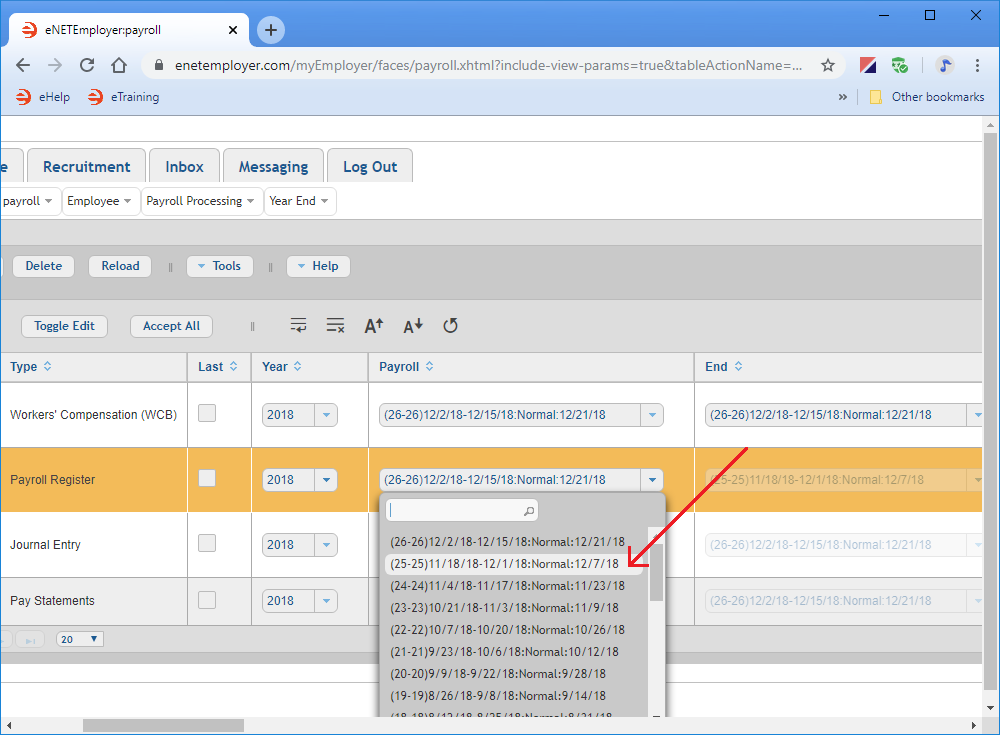
- Move to the Payroll cell for your report row and then click on the drop-down arrow and choose your desired pay cycle from the list.
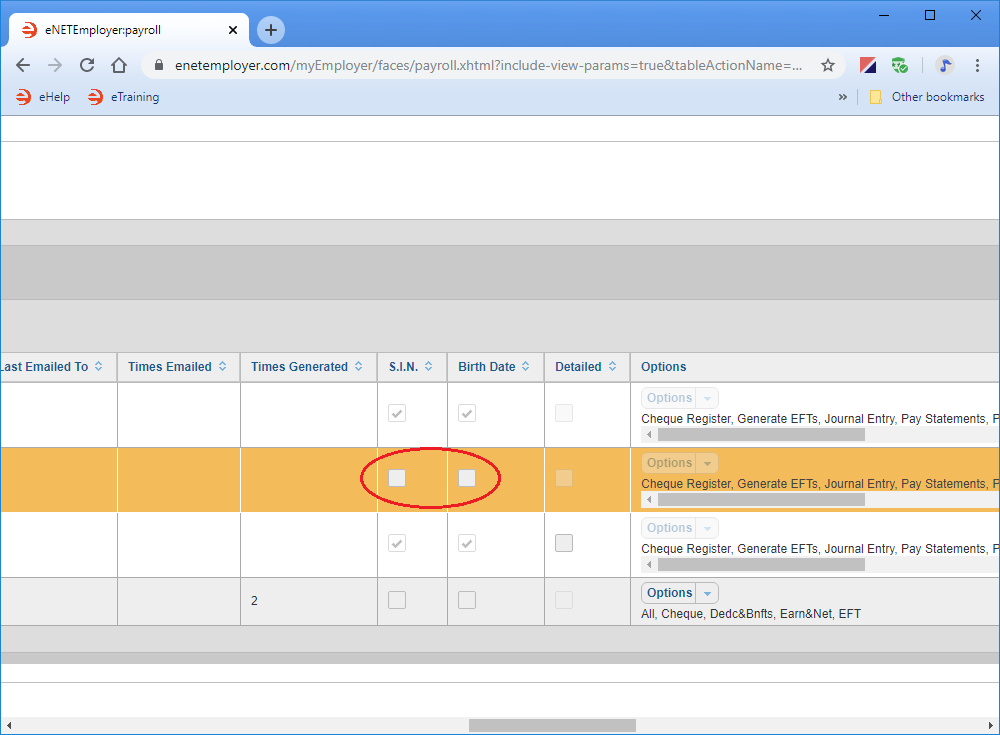
Example: In Fig. 06 below, we chose pay cycle 25 - the cycle that was closed before current cycle 26. The next time we create this report, it will use the selected pay cycle instead of the default. - Select the Payroll Register report row (if you have that report added to your list, otherwise simply review our example below), scroll to the S.I.N. column, and then remove the check from its box.
- Repeat the preceding step, removing the check from the Birth Date cell also.
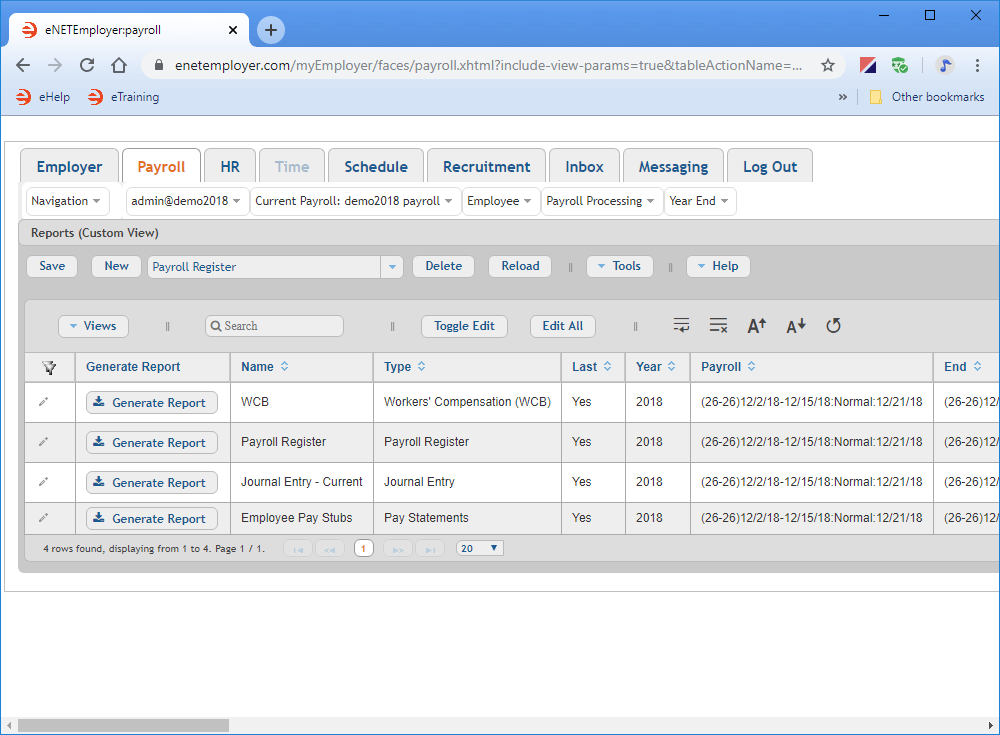
Our sample above indicates that we have already added 4 report rows to the table. These four reports represent the basic reporting functions that we use for each pay cycle (Payroll Register, Cheque Register, Journal Entry and a WCB report).
We will proceed with this tutorial based on the 4 sample reports above. If you wish to add your own reports, please do so before proceeding.
Adding Reports - New reports can be added to the table by choosing the desired report type from the drop-down menu beside the New button, and then selecting the New button to insert the corresponding report row. To learn how to add reports easily, please view the lesson on Creating a Basic Report. |
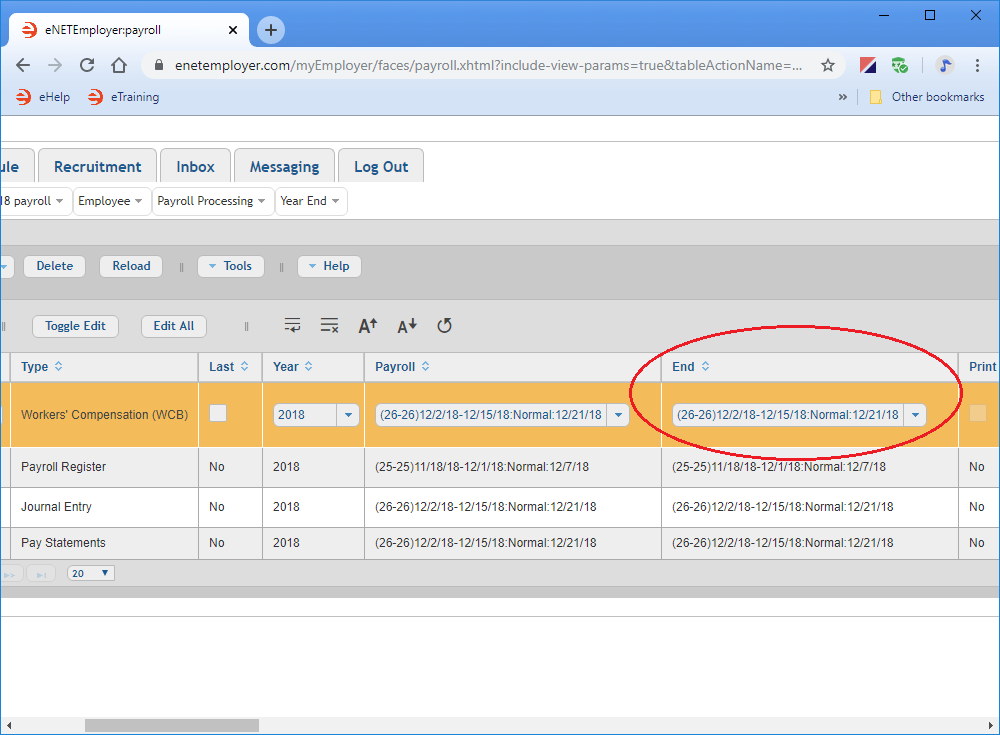
Each time you deactivate the Last setting for a report, you will notice that the Payroll column becomes enabled for the corresponding row. This means that you can now choose a different pay cycle on which to base the report. Notice also that the End columns become enabled for report types that support multiple payroll dates (in our sample, the WCB report).
We will now make additional report setting changes.
The next time we create this report, each employee's social insurance number and date of birth will be excluded.
We will now proceed to the final part of the lesson and learn how to modify the default date range for your reports.
To Customize the Default Date Range:
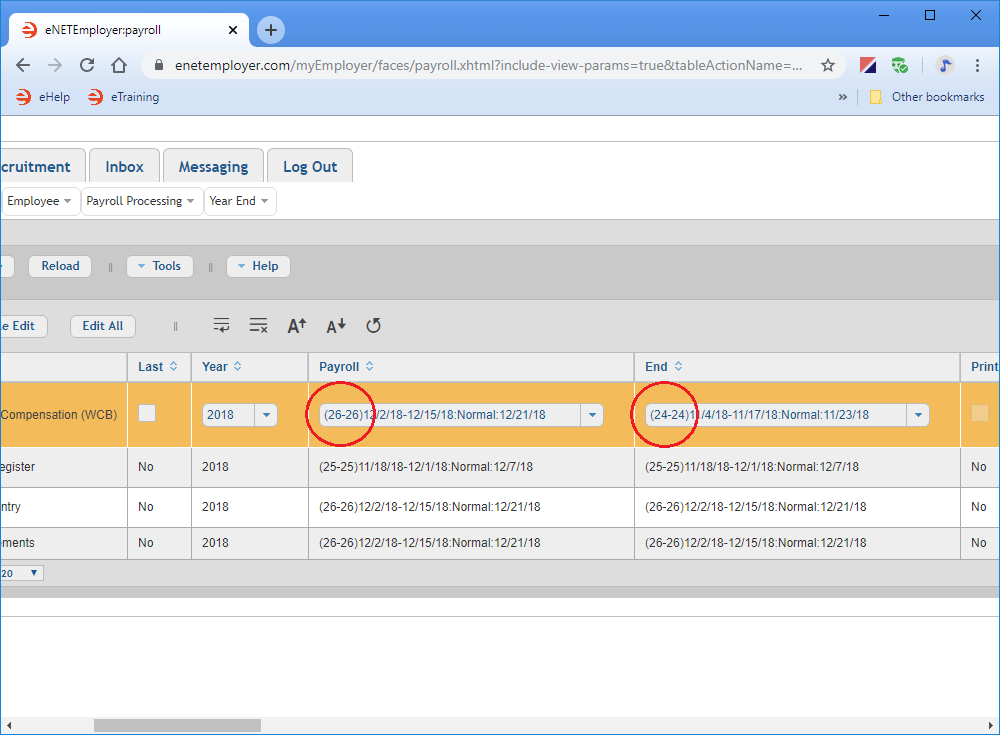
- With both the Payroll date and End date cells enabled, choose the desired start and end dates for your report. In the example below, we have chosen pay run number 20 through 24.
- When you have finished creating your reports, choose the Save icon (the Check Mark icon at the left side of the row) to accept your changes. This action saves the changes for the row and takes you out of Edit Mode. These custom report changes will now be in place the next time that you create each report.
Note: It's important to note that not every report can be based on a date range. In fact, most reports can be based on a single pay cycle only. For example, of our 4 sample reports (see below), only the Workers' Compensation report can be created across a range of pay runs. Range-based reports are those that have the End column enabled when the Last option is deactivated.
By default, both the start and end dates are set to the last closed pay cycle. This will result in a report that spans a single pay period only.
Based on the report settings we have defined, the Workers' Compensation report will span three pay periods.
Saving Custom Report Settings - Remember that the saved report settings will apply to subsequent reports that you create. If you are changing a setting for a one-time report only, then you should not save your setting changes. If you switch between report settings on a regular basis, you may find it easier to simply add a second report row of the same type, and then make the setting change for the new row. Then you will have two reports of the same type from which to quickly choose from - one with the default settings, and another with your custom settings. You can also change the second report's name so that you can easily differentiate between the two. For example, you could add two Payroll Register report rows and leave one with the default setting, and remove the S.I.N. checkbox from the second report. Then you could label the second report as "Payroll Register - No SIN" to indicate that reports created from the second report row will not include social insurance numbers. |
This completes the tutorial on how to create historical reports and to customize your report settings.
See Also
- Reports Overview
- Payroll Reports
