Help Toolbar (select a button to browse other online help sections) Home Tutorials Resources Search Tabs & Menus Button Bar Table & Data Display |
Creating an Electronic Funds Transfer File
EFT Overview - If you wish to learn more about EFTs in eNETEmployer, refer to the EFT Overview before proceeding with this tutorial.
For this tutorial, we will discuss how to pay your employees using the EFT - Electronic Funds Transfer feature (also referred as Direct Deposit). eNETEmployer allows you to deposit funds in up to three separate employee bank accounts (e.g. bank, credit union, or other financial institution).
There are a number of steps you need to perform before you can create the actual EFT file, including:
- Step 1: Company Bank information - How to enter the banking information for your company.
- Step 2: Employee Bank Information - How to enter the banking information for each employee who is to be paid via EFT.
- Step 3: Create the EFT File - How to create the electronic file that can be forwarded to your bank for fulfillment.
Before You Begin: - Setting up your EFT information requires that you have made previous arrangements with your bank and that you have the pertinent information you will need in order to complete the various cells on this screen. |
NOTE: Click on an image below to view it at full size.
Step 1: Enter Your Company's Bank Information:
- The first step is to open the Current Payroll - EFT screen, and enter your business's banking information. This information will be included in the electronic file that will be forwarded to your company's bank (or other financial institution) for processing.
When you have completed the steps in the above tutorial, proceed to the next step so that you can enter the bank information for each employee who is to be paid using the EFT feature.
Step 2: Enter Each Employee's Bank Information:
- The second step is to open the Employee - Bank Accounts screen, and enter the banking information for each employee who is to be paid using the Electronic Funds Transfer (EFT) feature. This information will be included in the electronic file that will be forwarded to your company's bank (or other financial institution) for payment processing.
When you have completed the steps in the above tutorial, proceed to the next step where you will create the electronic file that will include both the banking information for your company, and the payment details for each employee.
Step 3: Create the EFT File:
Once you have defined your both your company's bank information and the information for each employee who is to be paid via EFT, you can generate the electronic file. The file will contain each employee's net pay amounts and other information needed to pay each employee electronically.
Before you Begin: Generating an EFT should only be done after you have verified and closed your payroll. The following steps assume you have closed the associated payroll. |
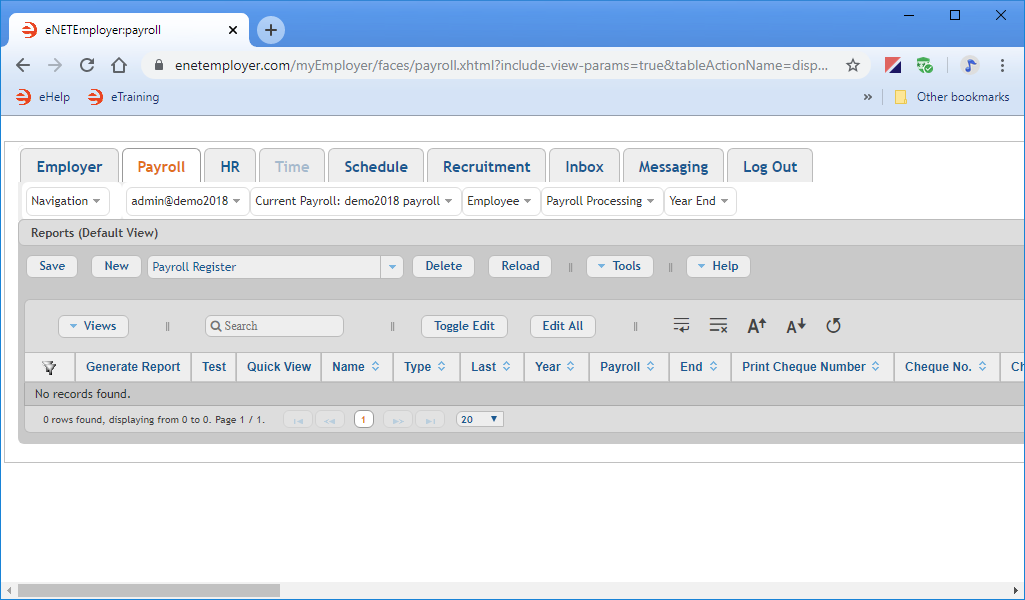
- From the Payroll tab, open the Payroll Processing - Reports screen where you can create the EFT file.
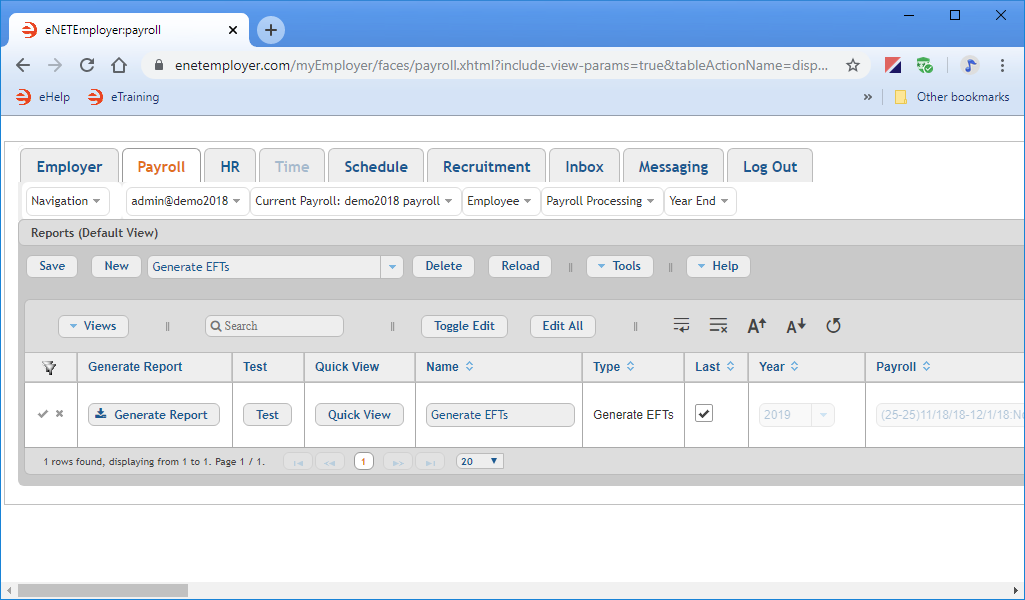
- Select the drop-down list that appears beside the New button, select the Generate EFTs option from the list, and then choose the New button. This action inserts a new report row into the table with its cells ready for editing.
- Employees - Use this cell to specify the employees that should be included when the EFT file is created. The default setting is to include all employees.
- Last - Use this cell to instruct the program to create the EFT file based on the most recently closed pay period.
- Payroll - Use this cell to specify the payroll on which the EFT file will be based. Note: If the value in the Last cell is set to Yes (i.e. its checkbox is activated), this cell will not be available for editing.
- Save the new row by choosing the Pencil icon at the leftmost side of the row, or by selecting the Save button from the Button Bar above the table.
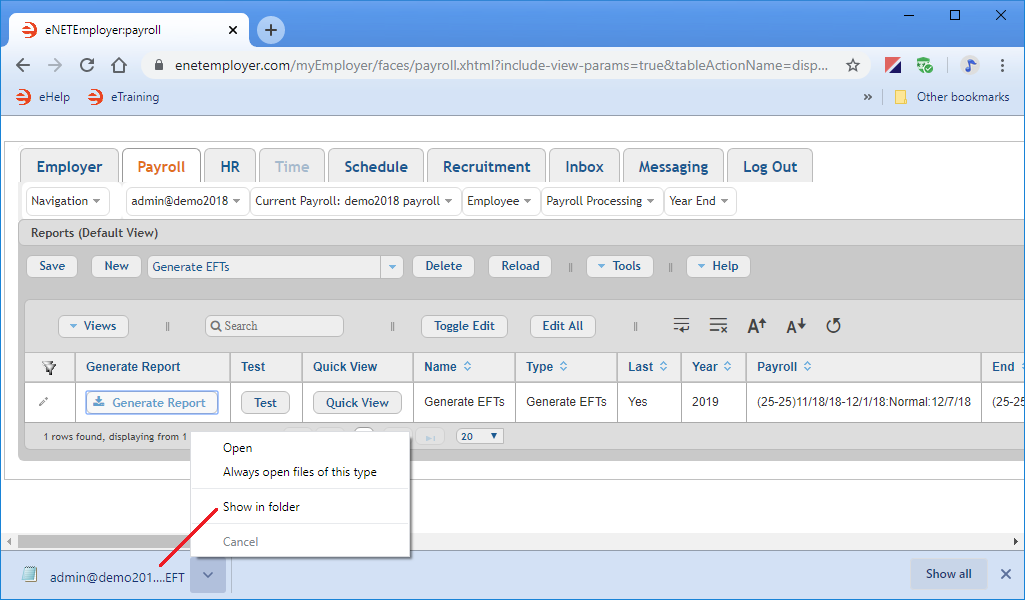
- Select the Generate Report button. A brief message is displayed as the program uses the payroll information to create the EFT data file. Once the process is complete, the EFT file is stored in your Downloads folder.
Depending on the browser you are using, the downloaded file will either appear as a link at the bottom of your screen, or it may appear as a link near the top of your browser, as it does with FireFox, Edge and others.
In the example below (using the Google Chrome browser), the downloaded file appears as a button link at the bottom of the browser window. Clicking on this button display a menu with several options, including a Show in Folder command that allows us to instantly navigate to the Downloads folder.
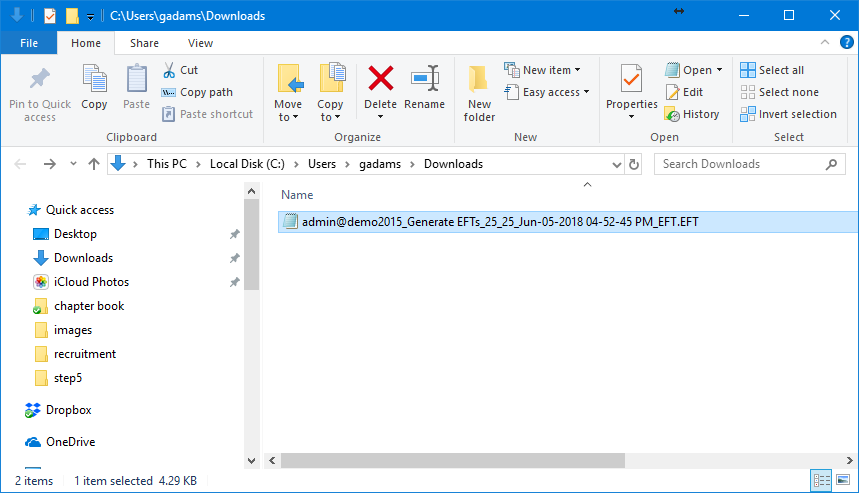
- Open your Downloads folder to view the generated EFT file location. In the example below, we have navigated to the Downloads folder where we can see the generated EFT file.
The EFT data file is now ready to be forwarded to your company's bank or financial institution for payment processing.
This completes the tutorial on creating the EFT file.
Note: If you are working through the payroll process in order, you can now proceed to the Forwarding an EFT File to Your Bank tutorial.
If you have never created a report, the screen will not contain any report rows (as shown in the example below).
Default Row Settings - As you review the row you have just inserted, you will notice that there are a number of columns and settings available. Some options are unavailable, indicating that the particular option is not applicable to an EFT file. Conversely, other options are available for EFTs and can be modified as needed to suit your unique payroll situation. For example: |
See Also:


