Help Toolbar (select a button to browse other online help sections) Home Tutorials Resources Search Tabs & Menus Button Bar Table & Data Display |
Entering your Company's EFT Settings
EFT Overview - If you wish to learn more about EFTs in eNETEmployer, refer to the EFT Overview before proceeding with this tutorial.
For this tutorial, we will show you how to enter the setting for your company if you plan to use the Electronic Funds Transfer (EFT) feature to pay your employees. eNETEmployer's EFT (Direct Deposit) feature allows you to deposit an employee's wages in up to three separate accounts (banks, credit unions, other financial institutions, etc.).
Before You Begin: - Setting up your EFT information requires that you have made previous arrangements with your bank and that you have the pertinent information you will need in order to complete the various cells on this screen. Note: This tutorial will discuss the initial step in the EFT process where you set up the banking information for the account that will fund the payroll. Subsequent tutorials will discuss the employee portion (setting up each person's personal bank account info), along with the creation of the EFT file that will be forwarded to your company's bank for processing. See the bottom of this page for these other EFT-related tutorials. |
NOTE: Click on the images below to view them at full size
To enter your company's bank information:
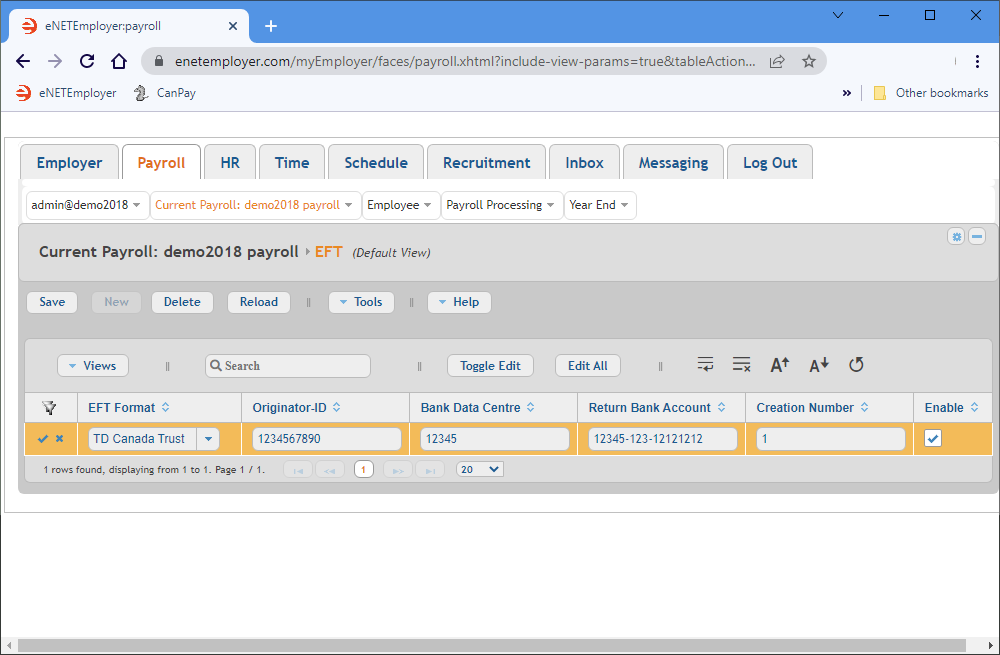
- From the Payroll tab, open the Current Payroll - EFT screen where you must enter the information that will be used to create the electronic file that will be forwarded to your company's bank (or other financial institution) for processing.
- Choose the New button from the Button Bar. This inserts a new EFT row into the table and activates Edit Mode for the cells.
- Complete the account data for each cell as it relates to your company's bank or financial institution (press <F1> to use the Online Help system if you need to look up a definition for the various cells).
- Move to the EFT Format cell and enter the name of the employee's financial institution (Royal Bank, ABC Credit Union, etc.). Note: This name is for administrative purposes only - the resulting EFT data file will be generated in the Canadian Payment Association's standard format.
- Move to the Originator ID cell and enter the bank's 10 digit Originator ID (sometime referred to as the Customer Number), as supplied by the financial institution.
- Move to the Bank Data Centre cell and enter the Data Center ID number as supplied by your financial institution. This number is typically 5 digits in length.
- Move to the Return Bank Account cell and enter the bank's Transit, ID and Account number. All three numbers must be entered in sequence, separated by hyphens as outlined below:
- Transit - The transit or bank branch number. This is typically a 5 digit number, e.g. 12345.
- Bank ID - The bank identification number. For example, the ID number for the Royal Bank is 003.
- Account - The bank account number. This can be up to 12 digits in length, e.g. 123456789012.
- Move to the Enable cell and ensure that there is a check in its box. If checked, eNETEmployer will include the data for this bank account when calculating the current payroll.
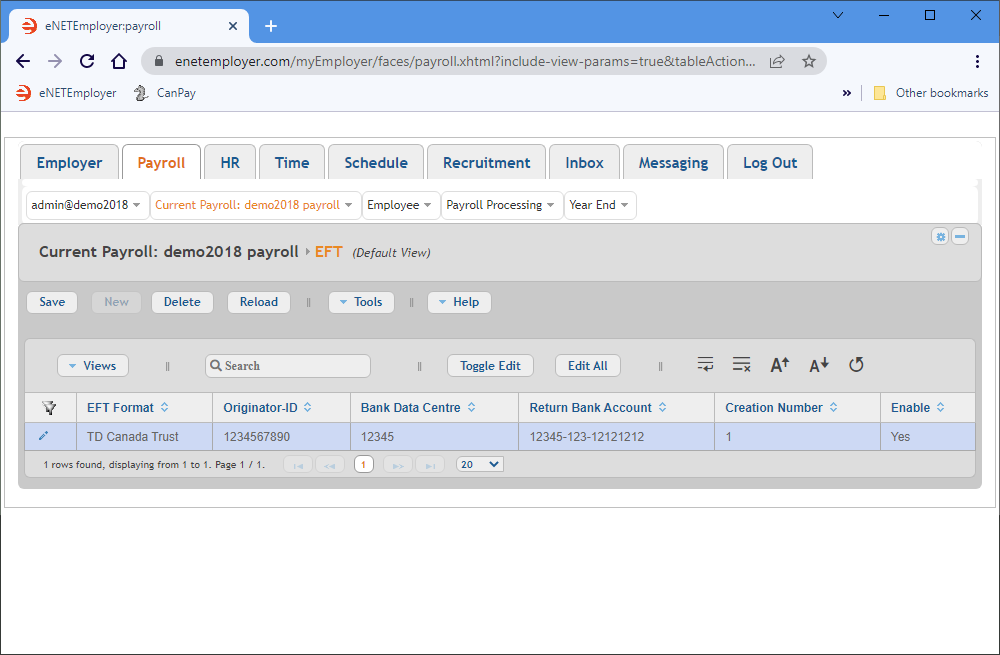
Example: In the example below, we have entered the banking information for our sample company. The Return Bank Account number will be used in the event that the EFT is not deliverable (in such a case, the EFT funds would be returned to the company's general account). The Creation Number is set to "1" and will increment automatically each time a subsequent EFT run is processed. - Once your data is complete, select the Save icon (the check mark icon at the left side of the row). This accepts the changes and the Edit Mode icons are removed to indicate that the entire row has been saved. You can also choose the Save button from the Button Bar above the table.
| EFT Format | Originator-ID | Bank Data Centre | Return Bank Account | Creation Number | Enable |
|---|---|---|---|---|---|
| TD Canada Trust | 1234567890 | 12345 | 55555-333-121212121212 | 1 | Yes |
Follow Up Steps: Now that your company's bank account information is added, you will also need to enter the bank account information for each employee who is to be paid by EFT. This process is described in the Defining Employee Bank Account Information tutorial.
This completes the tutorial on defining your company's bank account information for EFT purposes.
Note: If you are working through the payroll setup process in order, you will need to continue through the Payroll menu to finish entering the data that is required for your particular payroll.
See Also:

