Help Toolbar (select a button to browse other online help sections) Home Tutorials Resources Search Tabs & Menus Button Bar Table & Data Display |
Entering Employee Bank Account Information
EFT Overview - If you wish to learn more about EFTs in eNETEmployer, refer to the EFT Overview before proceeding with this tutorial.
For this tutorial, we will discuss how to define the bank information for your employees. Each employee requires a number of settings if you plan to pay them using the Electronic Funds Transfer (EFT) feature.
Before you begin: This tutorial assumes that you have already added a number of employees to your payroll. If you have not yet added your employees, proceed to the Setup Employee screen to do so. |
NOTE: Click on the images below to view them at full size
To define employee bank account information:
-
From the Payroll tab, open the Employee - Bank Accounts screen where you can review or edit the bank account information that is required for each employee who is to be paid using via EFT. An employee must have at least one bank account enabled in order to be paid using the EFT feature (employees can have EFT funds distributed to up to three bank accounts).
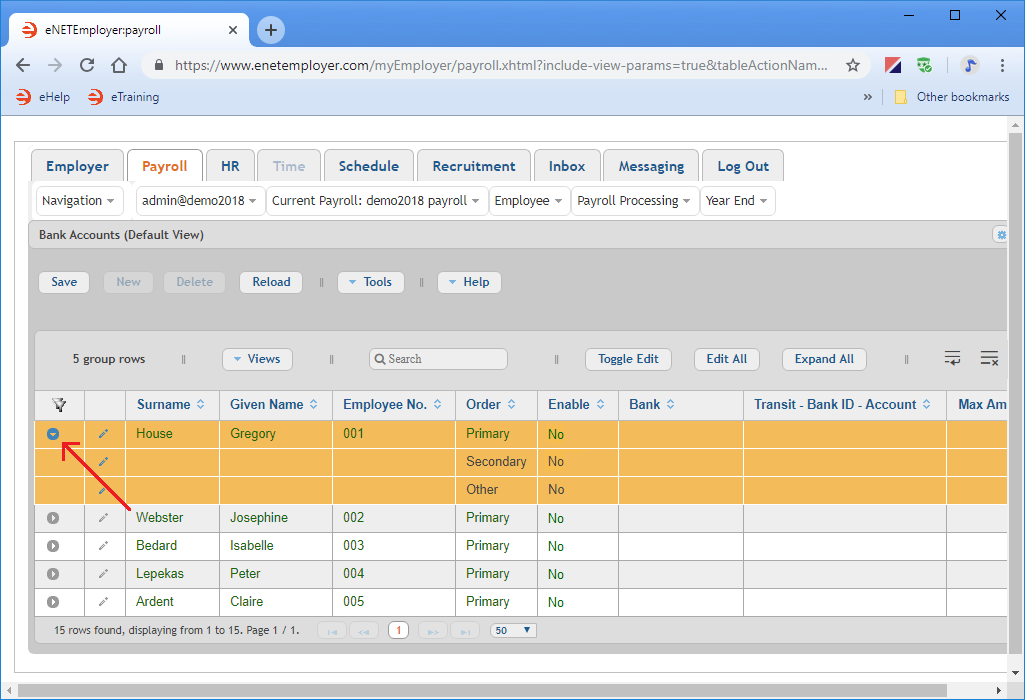
- Move to the row for the employee whose information you wish to enter, and then click on the Expand button (the right-facing triangle at the beginning of the row). This expands the row to reveal two further sub rows that support additional bank accounts if needed. Note: The top row is referred to as the Primary row and is shown in Green text.
- Double-click on the Primary row for the employee to activate Edit Mode, and then enter their bank account information (press <F1> to use the Online Help system if you need to look up a definition for the various cells).
- Move to the Enable cell and ensure that there is a check in its box. If checked, eNETEmployer will include the data for this bank account when calculating the current payroll.
- Move to the Bank cell and enter the name of the employee's financial institution (Royal Bank, ABC Credit Union, etc.). This name is used in eNETEmployer only and will not appear outside of the program.
- Move to the Transit - Bank ID - Account cell and enter the bank's Transit, ID and Account number. This number is typically found on an employee's personal cheque and must be entered in a specific format as outlined below:
- Transit - The transit or bank branch number. This is typically a 5 digit number, e.g. 12345.
- Bank ID - The bank identification number. For example, the ID number for the Royal Bank is 003.
- Account - The bank account number. This can be up to 12 digits in length, e.g. 123456789012.
- Lastly, if the employee wishes to have a specific amount of wages deposited into this account (with the remainder issued as a printed cheque), move to the Max Amt cell and enter the maximum amount of funds that can be placed into this account during the EFT process. This cell is not used for most employees since they typically have their entire cheque amount deposited into a single account.
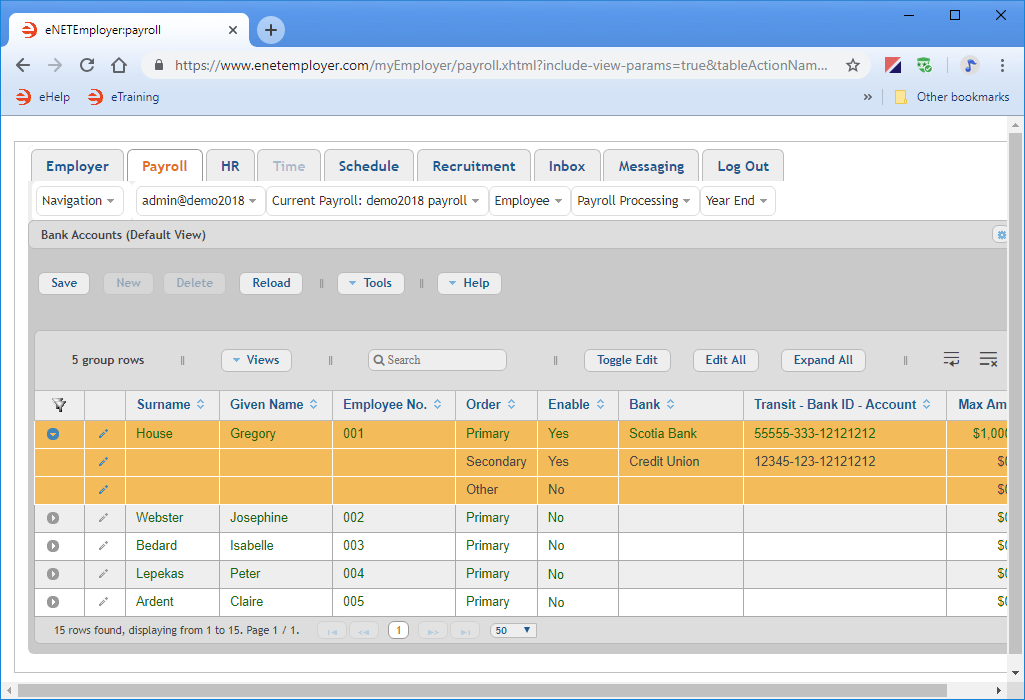
Example: In our example below, we have entered the bank information for our first employee, Gregory House. Gregory will have his wages deposited into two accounts; $1000 into his Scotia Bank account, and the balance of his pay into the Credit Union account.
- Save each row's information when you are complete (or choose the Save button from the Button Bar to store all of the changes in one action).
- Repeat the preceding steps to enter the bank account information for your other employees.
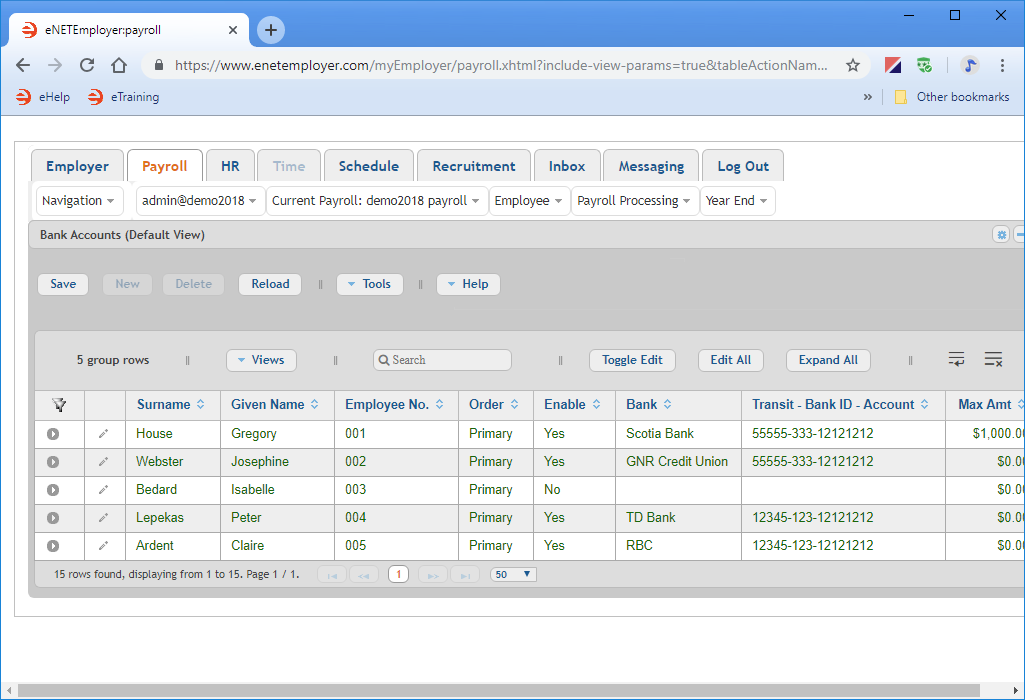
Example: In the example below, we have entered the bank information for our remaining four employees. Three employees have a single bank account each, and one employee does not wish to have their funds deposited via EFT (therefore, their bank information is left blank).
- When you have finished reviewing and/or modifying the data, save the information for all of the rows.
Note: If you are working through the Quick Start Guide in order (or have completed the tutorials on adding employees - manually or with an employee template), the five employees that you created earlier will appear in the table along with a number of blank bank-related cells that need to be defined. Also, if you have completed the Defining Employee Tax Parameters tutorial, some of the bank-related cells will already be completed.
| Employee | Order | Enable | Bank | Transit-Bank ID-Account | Max Amt. |
|---|---|---|---|---|---|
| Gregory House | Primary | Yes | Scotia Bank | 55555-333-12121212 | $1000 |
| Secondary | Yes | Credit Union | 55555-333-12345678910 | - | |
| Other | No | - | - | - |
| Employee | Order | Enable | Bank | Transit-Bank ID-Account |
|---|---|---|---|---|
| Josephine Webster | Primary | Yes | GNNR Credit Union | 55555-333-12121212 |
| Isabelle Bedard | Primary | No | - | - |
| Peter Lepekas | Primary | Yes | TD Bank | 12345-123-12121212 |
| Claire Ardent | Primary | Yes | RBC | 12345-123-12121212 |
This completes the tutorial on entering employee bank account information.
Follow Up Steps: Now that each employee's bank account information is added, you can use the EFT option in the Reports screen feature to generate the electronic file that will include their pay information. This process is described in the Creating an Electronic Funds Transfer File tutorial.
Note: If you are working through the payroll setup process in order, you will need to continue through the Employee menu to finish entering the data that is required for each new payroll employee.
See Also:


