Quickstart Menu (choose a topic to visit a section of the guide)Help Home | Step 1: Create Account Step 2: Company Setup Step 3: Payroll Setup Step 4: Add Employees Step 5: Process Payroll |
Quick Start Guide Progress: 90%

Step 5: Enter Work Hours and Process Your Payroll
This step involves entering the hours that your employees have worked for the current pay period. It will also include how to verify your payroll details before you close the pay and run the final calculation. Once the payroll is finalized, we will also discuss how to run various reports.
NOTE: Click on the images below to view them at full size
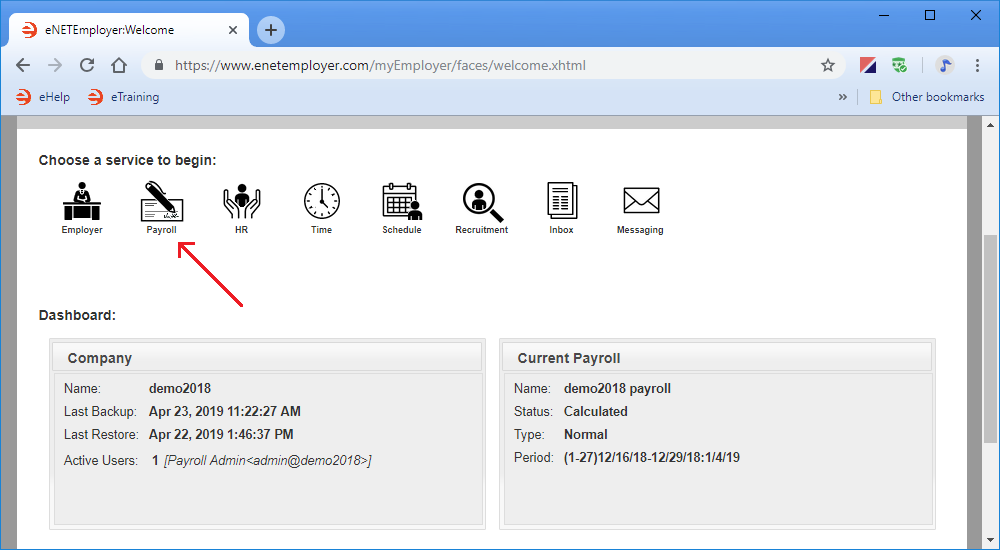
5A - Sign In and Open the Payroll Service:
- Sign in to eNETEmployer and choose the Payroll service icon from the Welcome screen.
5B - Enter Your Employee Work Hours
Before you can calculate a payroll, you must enter the hours that each employee has worked for the pay period. Note: Hourly-based employees will require their time to be entered for each pay period since it is assumed that these hours may fluctuate from one period to the next. Conversely, Salary-based employees do not need to have their hours entered each pay period since the program sets them to reoccur every pay period (unless you override them).
The following tutorial will describe the manual method of entering work hours.
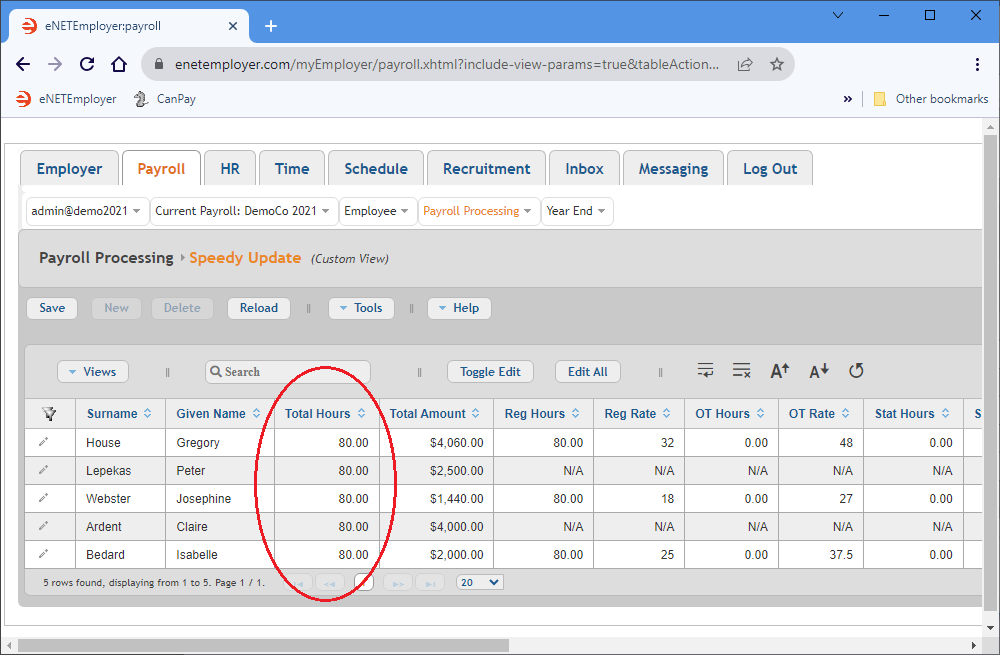
From the Payroll tab, open the Payroll Processing - Speedy Update screen where you can enter the hours that your employees have worked for the pay period.
Show Me How...
Example: In Fig. 02 below, we have entered the work hours for 3 sample hourly employees.
This completes the employee work hours. You can now continue to the next step and process your payroll.
5C - Calculate Your Payroll
Each time you make a change to your payroll, you should perform a calculation. Each time the payroll is calculated, the results of the previous calculation are erased and replaced with the new results. A payroll may be calculated as many times as needed before it is closed. This provides the opportunity for reviewing the pay run details and for other testing purposes.
The following tutorial will show you how to calculate a pay sequence for a regular type of pay run.
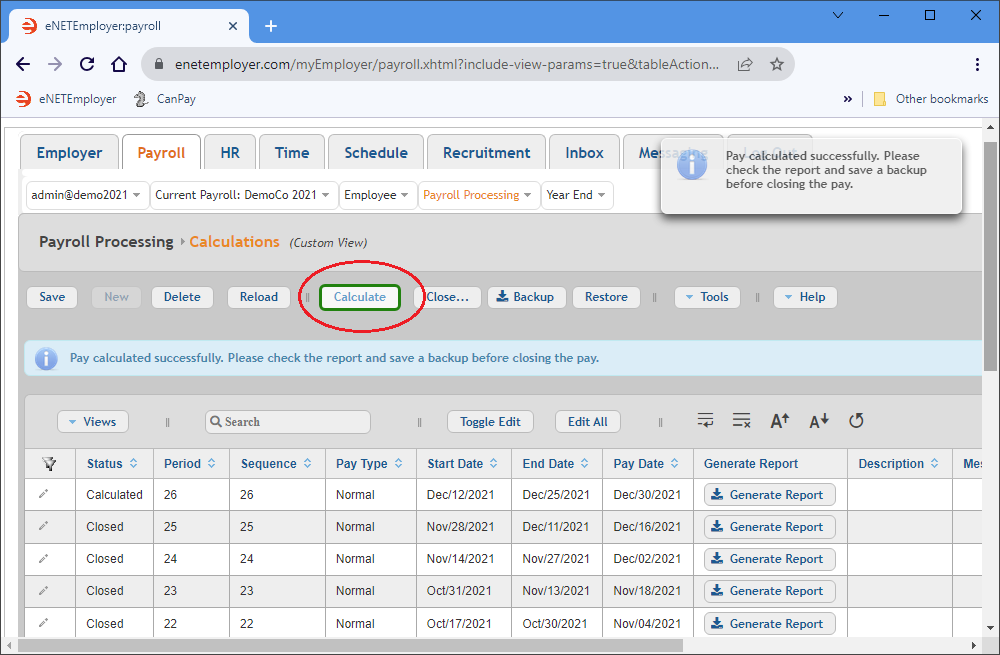
From the Payroll tab, open the Payroll Calculations - Calculations screen where you can define the required settings for performing a payroll calculation.
Show Me How...
Example: In Fig. 03 below, we have successfully calculated our pay sequence.
This completes the payroll calculation. You can now continue to the next step and review your payroll.
5D - Review Your Payroll
Once your payroll is calculated, you can create several types of reports to review your payroll calculations.
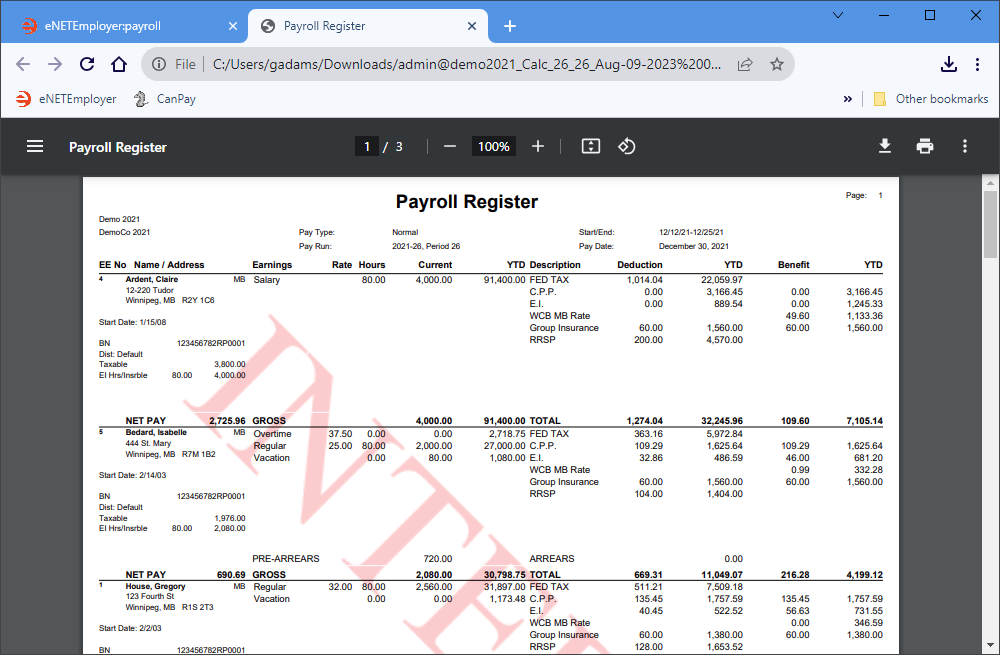
The following tutorial will show you how to create the Payroll Register report so that you can review the results of your calculated payroll.
From the Payroll tab, open the Payroll Processing - Calculations screen), and then select the Generate Report button from the Generate Report column (scroll to the right if you need to bring this column into view). You can also select the Report button from the Button Bar to create the report.
Show Me How...
Example: In Fig. 04 below, we see our interim Payroll Register report with 5 employees who have been paid for the current pay period.
This completes the calculation process. You can now continue to the next step and backup your payroll.
5E - Backup Your Payroll
Before any payroll can be closed and finalized, a backup must be performed. eNETEmployer requires that you perform this step so that you always have a fall-back point should you ever need to restore a payroll for a future need.
The following tutorial will show you how to backup your payroll.
From the Payroll tab, open the Payroll Processing - Calculations screen), so that you can gain access to the Backup button (the button appears in the Button Bar above the table).
Show Me How...
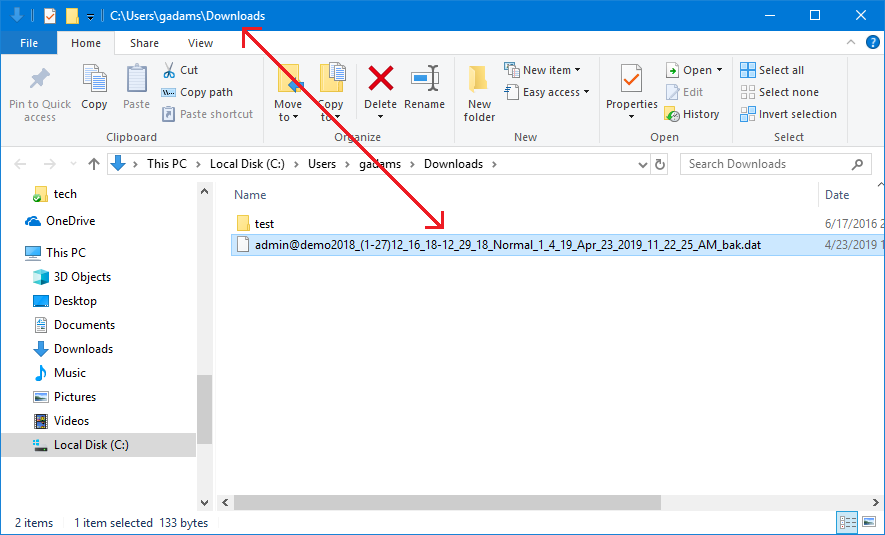
Example: In Fig. 05 below, we have created a backup and the file has been stored in our Downloads folder.
This completes the payroll backup procedure. You are now ready to close the payroll.
5F - Closing Your Payroll
With the backup now complete, it’s time to close the payroll. Once the pay is closed, you will no longer be able to make changes to the pay run.
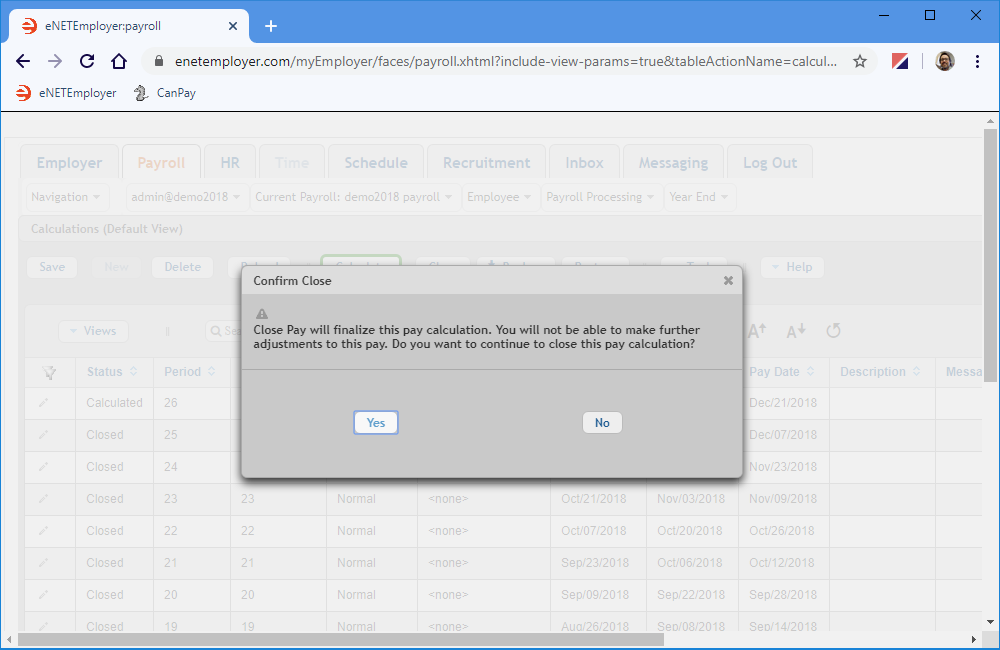
- Choose the Close button from the Button Bar that is located above the table. This displays a message prompting you to confirm that you wish to close the payroll.
- Choose the Yes button in the message to proceed with the close action.
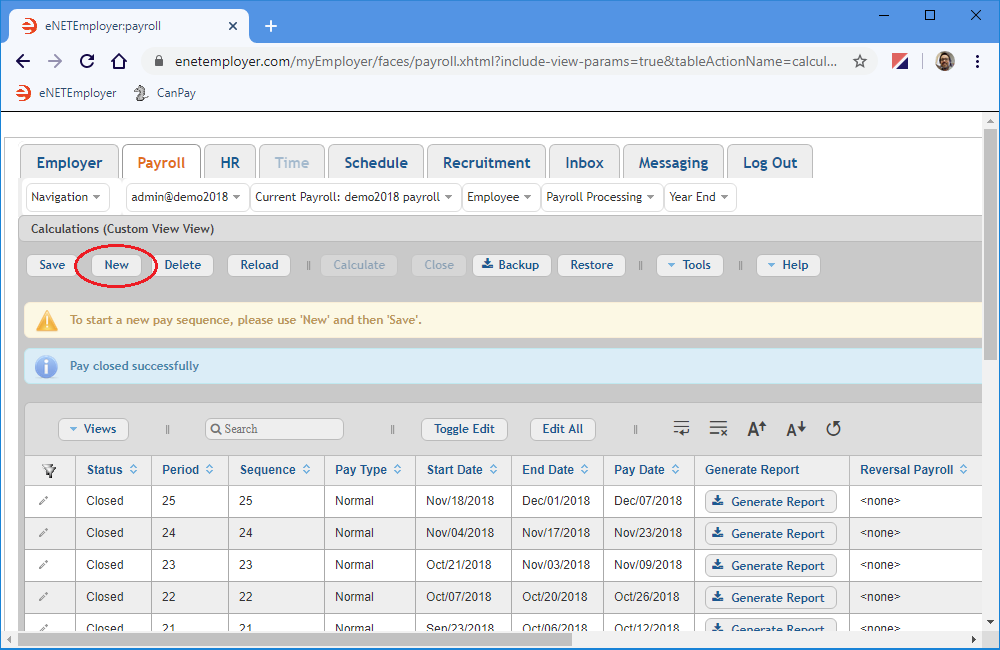
- After eNETEmployer finishes closing the payroll, two messages are displayed above the table; 1) An indicator that the pay was closed successfully, and 2) a reminder that you can insert a new pay sequence any time you ready to begin your next payroll.
Notice how the Status column now reads Closed and the Pay Sequence has incremented by 1. These indicators will be useful as you process successive payrolls over the year.
Example: In Fig. 07 below, our pay sequence has been closed and we can begin a new sequence by choosing the New button.
With the payroll closed, you can now create your pay statements, EFT file, or a variety of reports as needed.
5G - Payroll Reports
eNETEmployer provides many report options that allow you to review and analyze your payroll from every angle. Standard reports are included such as payroll registers, statements, cheque registers, journal entries and more. Powerful features are also provided via the program's unique "Print Any View" approach and "Customized Views" features. All reports are fully customizable and can help you to achieve a better understanding of your payroll.
For this section of the tutorial, we will produce three standard reports:
Refer to the Reports topic in the Online Help for a full description of other available reports.
• Employee Pay Statements
Show Me How to Create Pay Statements...
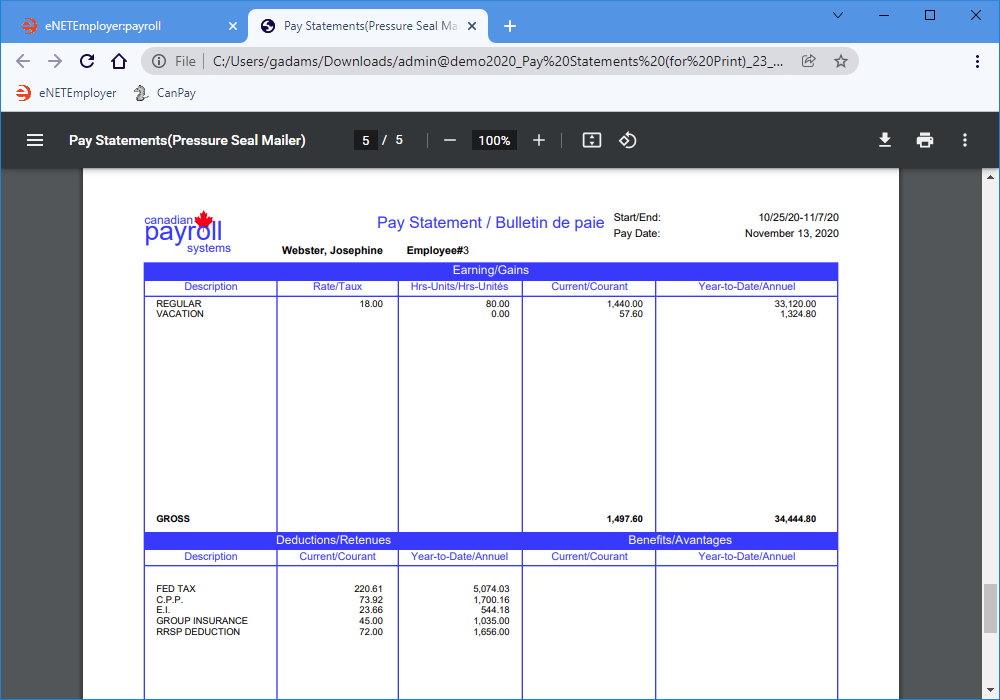
Example: In Fig. 08 below, we have created a PDF report with our employee pay statements.
• Email Pay Statements
Show Me How to Email Pay Statements...
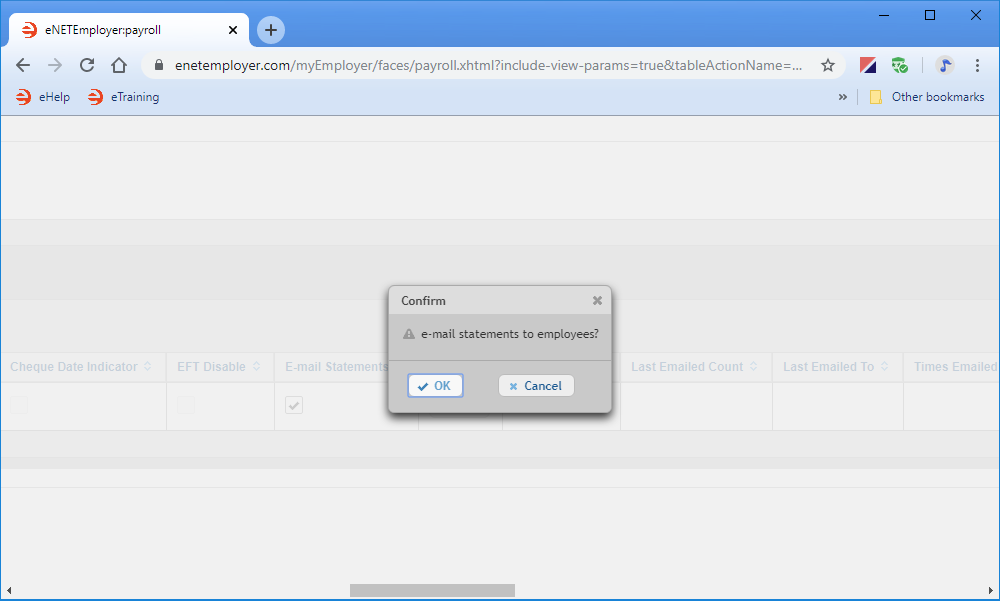
Example: In Fig. 09 below, we have used the Email option to send our pay statements to each employee.
• Electronic Funds Transfer (EFT)
Show Me How to Generate an EFT File...
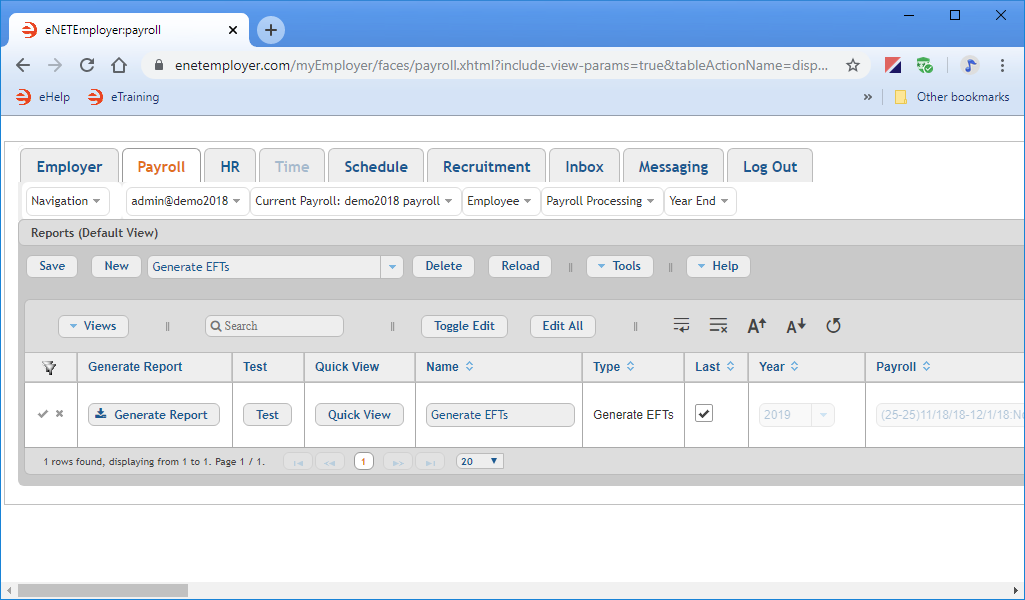
Example: In Fig. 10 below, we have used the Generate EFT report option to create the electronic file that is required for our bank to make direct deposit payments via the Electronic Funds Transfer feature.
Congratulations - you've created and processed your first payroll with eNETEmployer!
What's Next?
If you wish to learn more about the program, choose from the following options:
- Instructional Videos - Visit our YouTube Channel to view a series of How To videos that cover many program topics.
- Step-by-Step Tutorials - Visit our Tutorials page to view in-depth lessons on basic and advanced program functions.
- Online Help - Browse eNETEmployer's comprehensive Online Help System to view detailed explanations for all program screens and options.
Quick Start Guide Progress: 100%

