Help Toolbar (select a button to browse other online help sections) Home Tutorials Resources Search Tabs & Menus Button Bar Table & Data Display |
Create a Custom Job Questionnaire
For this tutorial, we will show you how to create a custom job questionnaire and then assign it to a job posting. Customized questionnaires can help to ensure that applicants provide you with specific responses you need in order to assess their suitability for the job. We will create a questionnaire for the hypothetical forklift operator job we created in an earlier tutorial: Create a Job Posting.
This tutorial has two sections:
NOTE: Click on the images below to view them at full size
To Create Your Custom Job Questionnaire:
- From the Recruitment tab, Recruitment - Questionnaires screen where you can create the set of questions that will be required from each job applicant as they apply for a given job posting.
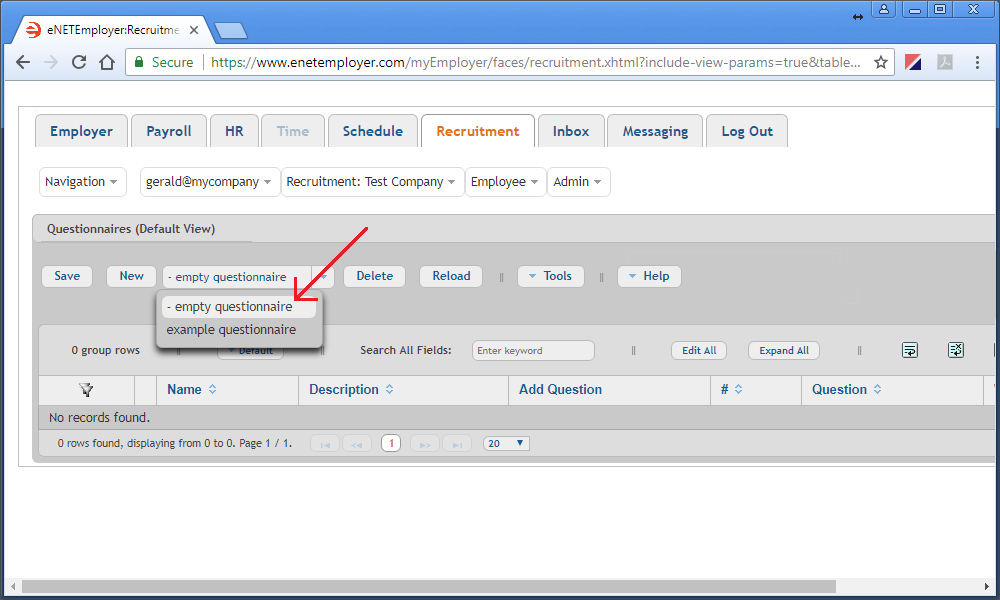
- When the Questionnaires screen appears, select the drop-down list immediately to the right of the New button. This list provides two options: the Empty Questionnaire option so that you can create one from scratch, and the Example Questionnaire option so that you can begin with a starting point of 10 common questions that can be edited as needed.
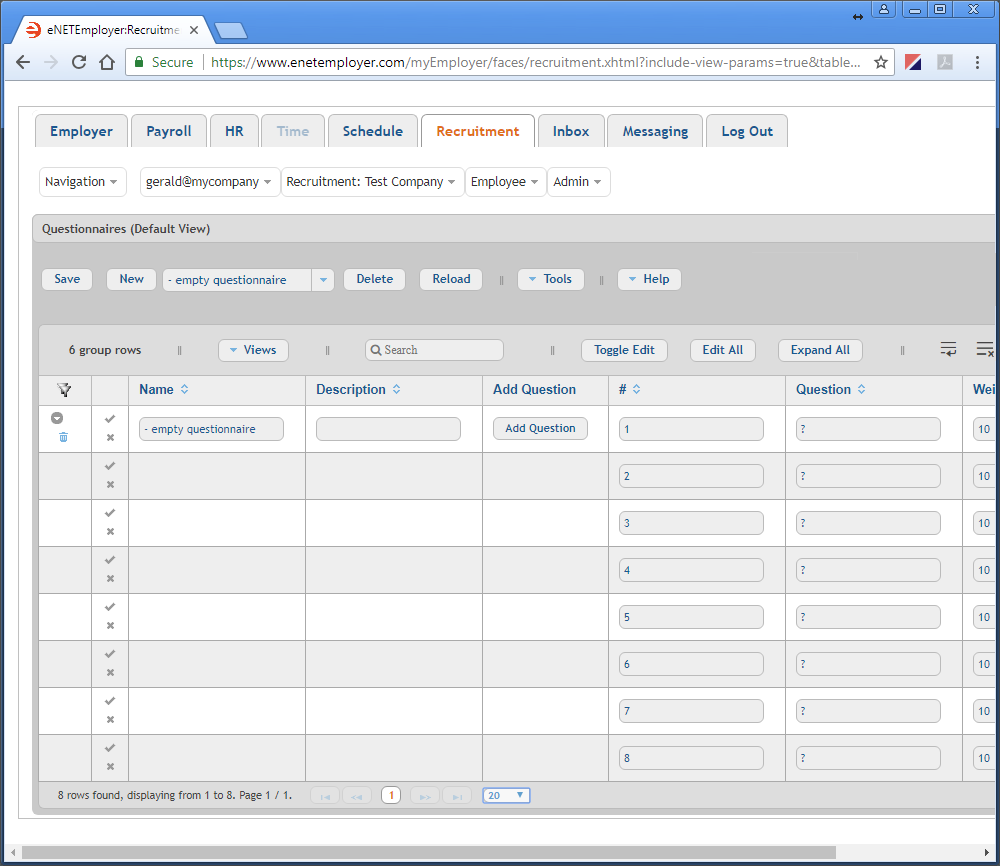
- Since we will be creating our list from scratch, choose the Empty Questionnaire option, and then select the New button. This inserts a series of 8 question rows into the table and activates Edit Mode for each of the cells.
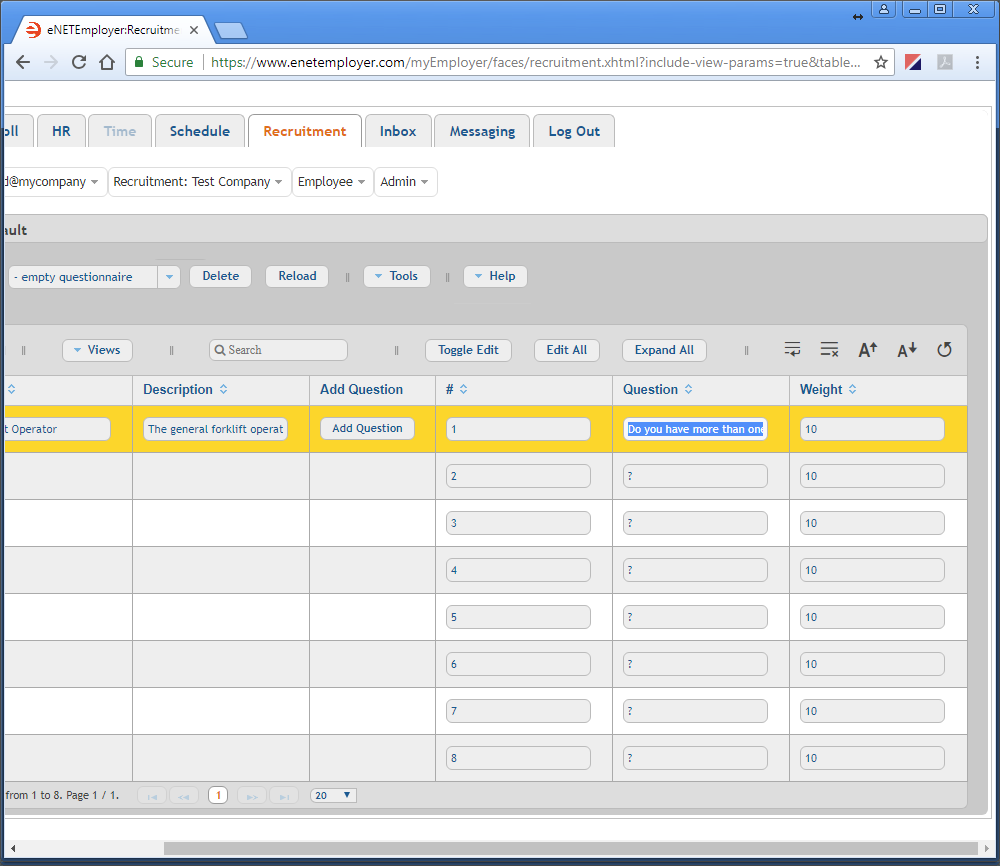
- Use the Name cell to enter a descriptive name for the questionnaire and then move to the Description cell and enter a description that will help you identify this questionnaire in the future.
- To create the first question, move to the Question cell in the first row and type the question text in the cell provided. In our example, we will enter "Do you have more than one year of forklift driving experience?"
- Move to the Weight cell and enter the weight value (score) for the current question. The weighting system uses a simple mathematical calculation to weigh the importance of certain responses when calculating the applicant's overall score. For example, if previous forklift driving experience is not very important, on a scale of 100, you could enter a value of 10 (i.e. the response to this question will have a limited effect on the applicants overall score). Or if previous driving experience is mandatory, you could enter a value of 50.
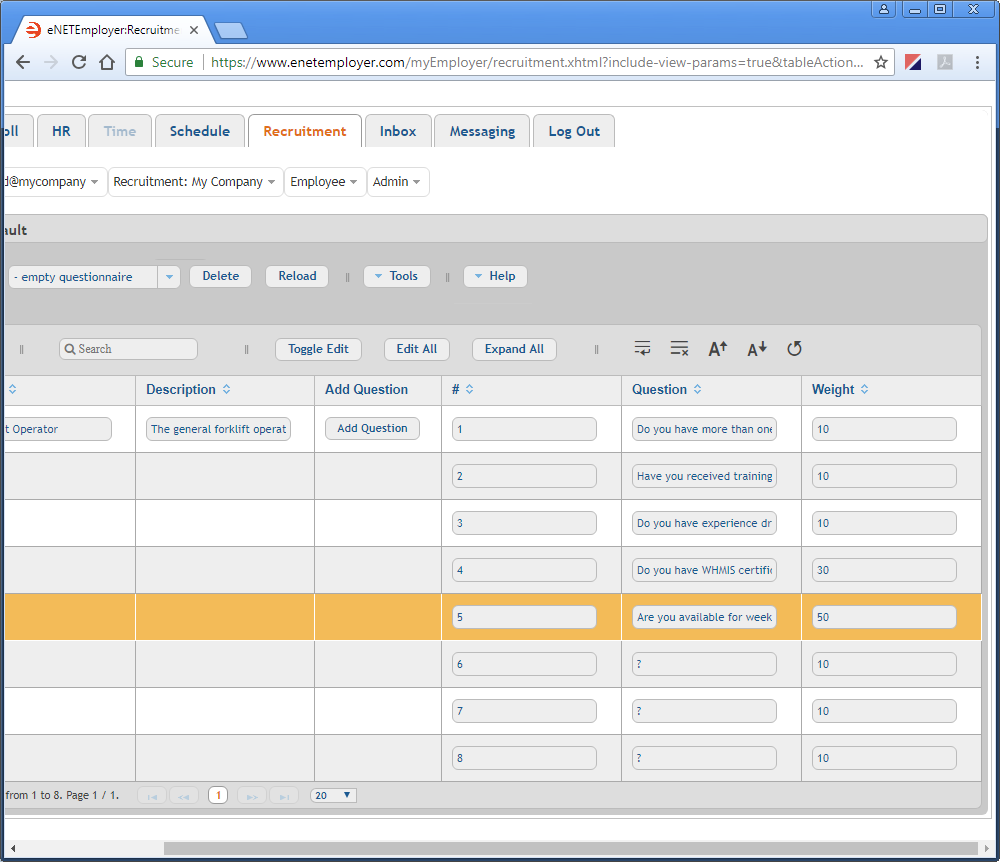
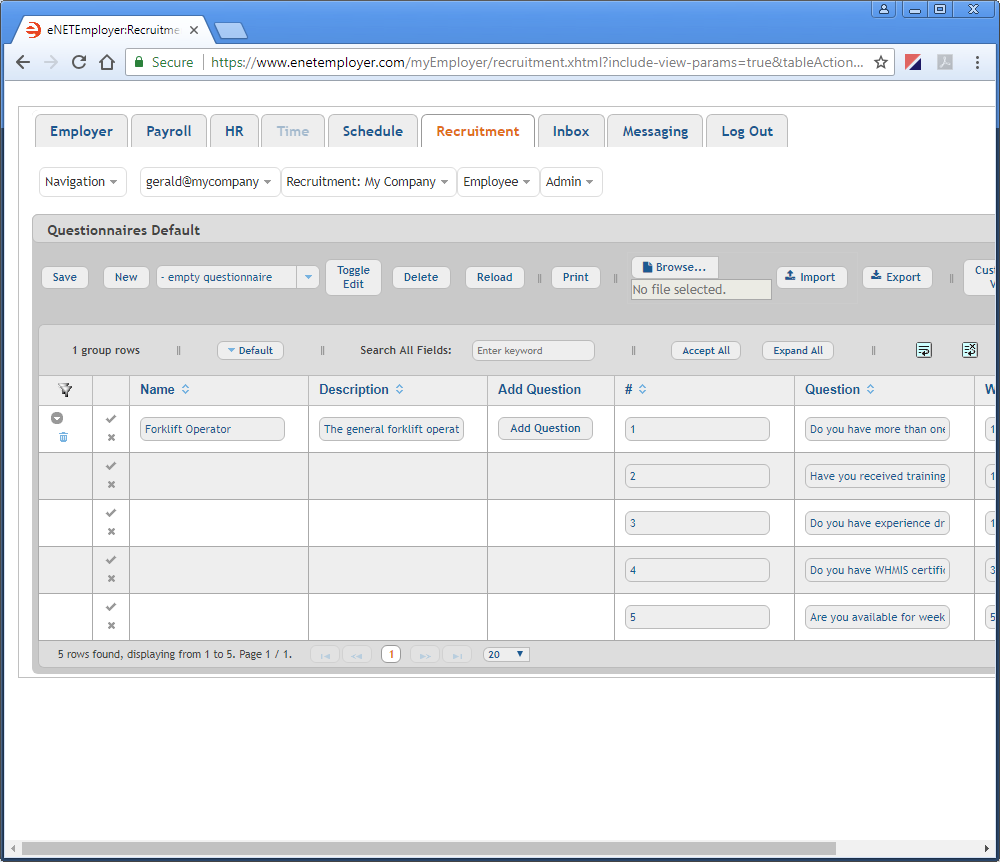
Example: In our example below, we will enter the following 5 questions and apply a weighting value for each.
- Click on row 6 to highlight it, and then hold down the <Ctrl> key as you click on rows 7 and 8 respectively. This action highlights all three of the rows.
- With the redundant rows highlighted, click the right-mouse button on any of the three highlighted rows to display a pop-up menu of options that can be applied to the selected rows.
- Select the Action menu item, and then choose the Delete option. When the Confirm Deletion message appears, choose Yes to delete the unneeded rows. Note: You can also press the <Delete> key on your keyboard or the Delete button from the Button Bar to remove the highlighted rows.
- With the questions now entered, you can save all of the rows at once by choosing the Save button from the Button Bar. Note: You can save each individual row at any time by choosing the Save button from the left side of each row (the Check Mark icon).
Example Questionnaires - Rather than start entering questions from a clean slate, you can choose the Example Questionnaire option from the drop-down list above. This will create a questionnaire using 8 common questions as a starting point. Each of the sample questions can be edited to produce your final questionnaire. You can also add or remove questions as needed. |
| Question # | Question | Weight |
|---|---|---|
| 1 | Do you have more than one year of forklift driving experience? | 10 |
| 2 | Have you received training on general forklift operating procedures? | 10 |
| 3 | Do you have experience driving 5 tonne capacity vehicles? | 10 |
| 4 | Do you have WHMIS certification? | 30 |
| 5 | Are you available for weekend and evening shift work? | 50 |
When the empty questionnaire was created, the program added 8 question rows as a starting point. Since we only need 5 rows for our short questionnaire, we can now remove the three redundant rows.
Now that you have created the custom questionnaire, you can assign it to the appropriate job posting as discussed below.
To assign the questionnaire to a job posting:
- From the Recruitment tab, choose the Recruitment - Job Postings menu option to open the Job Postings screen.
- Double-click on the first row to enter Edit Mode (or choose the Edit (the pencil) icon at the left side of the row).
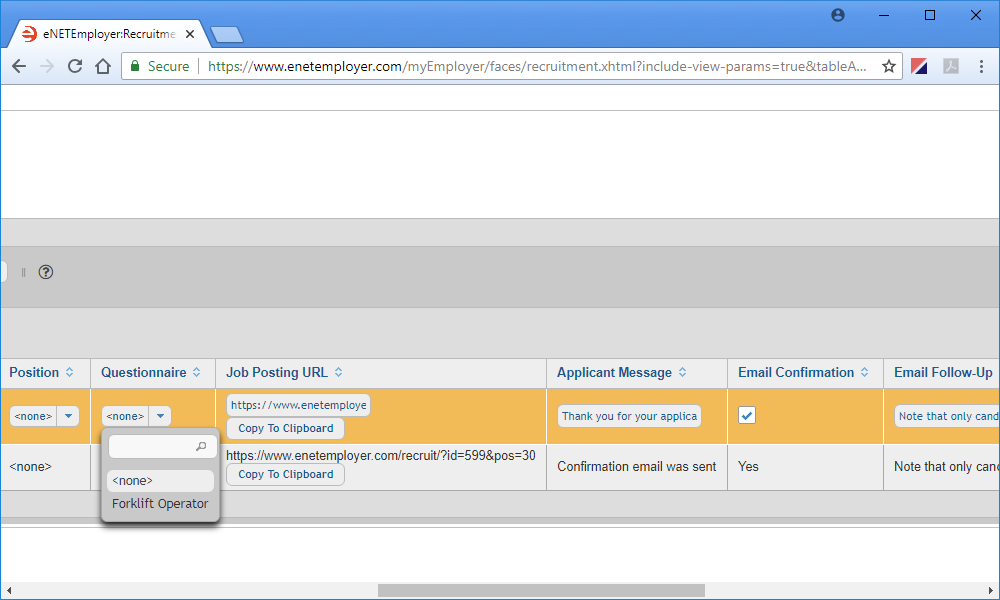
- Move to the Questionnaire cell, choose the Forklift Operator option from the drop-down list.
- Once you have made the change, choose the Save icon (the checkmark icon at the left side of the row) to accept your changes. This action saves the changes for the row and takes you out of Edit Mode.
This completes the second step of creating the job questionnaire and linking it to its related job. You are now ready to post the job for live viewing on your Recruitment web page.
See Also:
Posting a Job:
- Step 01 - Add a job posting to the Recruitment module
- Step 02 - Create a custom job questionnaire
- Step 03 - Post a job to your eNETEmployer recruitment webpage
- Step 04 - Link a job posting to your company website or an online location
- Posting jobs to your intranet for non-public viewing
Manage Job Applicants:
- Sort Applicants Based on their Score
- Review Applicant Submissions
- Assigning Applicants to other Positions
Optional Steps:
