Help Toolbar (select a button to browse other online help sections) Home Tutorials Resources Search Tabs & Menus Button Bar Table & Data Display |
Create a Job Posting
The first step in the recruitment process is to create a job posting record. This record will contain the information such as the job's description, posting and closing dates, automated applicant messages and much more.
For this tutorial, we will add a job posting for a hypothetical forklift operator position.
NOTE: Click on the images below to view them at full size
To Add a Job Posting:
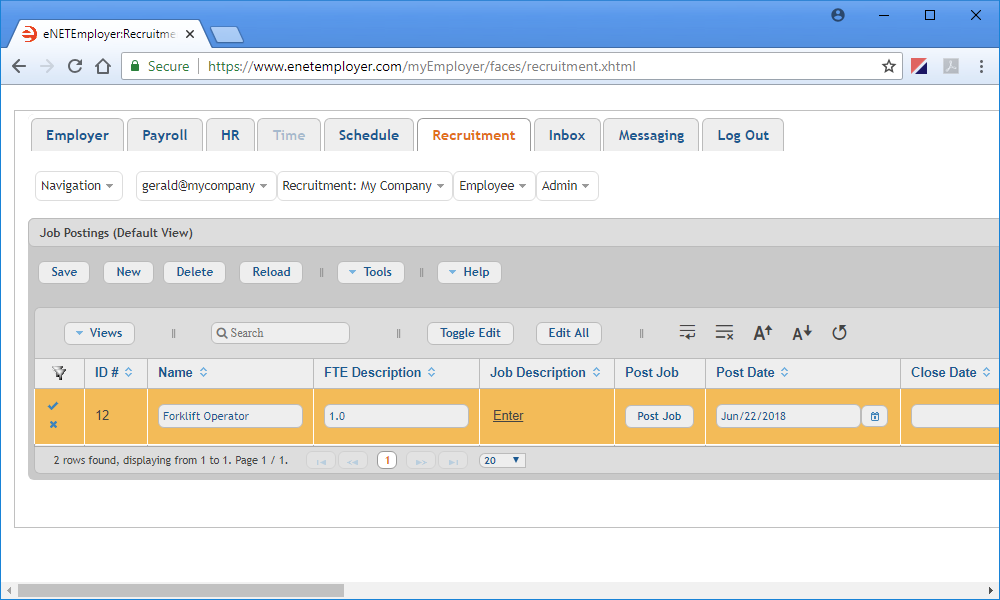
- From the Recruitment tab, Recruitment - Job Postings screen where you can setup the jobs and work opportunities that are available at your company.
- Choose the New button to insert a blank job row in the table.
- Use the Name cell to enter a descriptive name for the posting and then move to the FTE Description cell and enter the job's Full Time Equivalency (FTE) value. For example, if typical 2-week period in your business consists of 80 hours, your FTE would be 1.0.
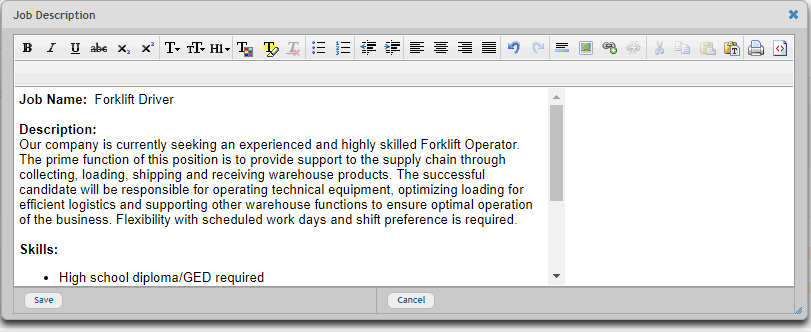
- Move to the Job Description cell and click on the Enter hyperlink. This opens a window that allows you to enter the detailed description for the job.
- Enter the job details as needed (the job's general outline and responsibilities, required qualifications or skills, a salary range, etc.). You can also paste content into the window from another program or document (e.g. word processor, spreadsheet, web page).
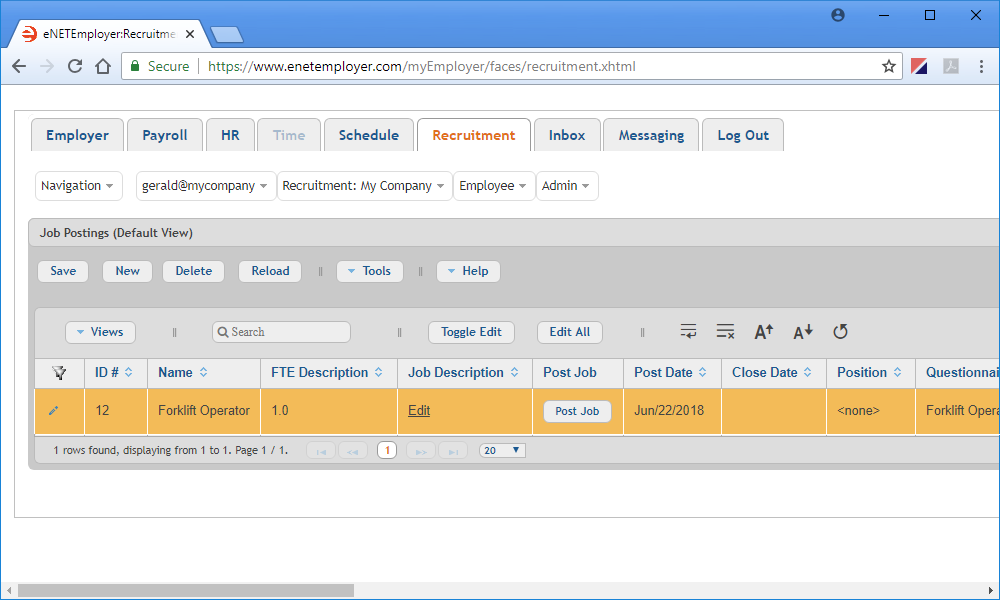
- When the job description is complete, choose the Save button to close the pop-up window. This returns you to the main screen where the cell's original hyperlink has been replaced with the word "Edit" to indicate that you can perform further changes to this description down the road.
- Use the Post Date and Close Date cells to specify the starting and ending dates for the job posting. You can schedule postings for a later release by entering a future date in the Post Date cell.
- If you are using the HR module, you can use the Position cell to assign the position that is associated with the job. We will leave this cell blank for this tutorial.
- Moving forward, you can leave the Questionnaire cell blank for the time being. We will return to this cell later once we have completed the questionnaire that is to be associated with this job posting. Questionnaire creation is discussed in the Create a custom questionnaire for a job posting lesson.
- Move to the Applicant Message cell and enter a message that will be displayed at the end of the application process. For our example we will enter: "Thank you for your application. An email confirmation has been sent to your address."
- If you wish to send each applicant a confirmation email, ensure that a check appears in the Email Confirmation cell.
- If you are sending a follow up email to each applicant and wish to also include a message in the email, use the Email Followup cell to enter the desired text. In our example, we will enter: "Note that only candidates selected for interviews will be contacted".
- Moving forward, use the Email cell to enter the email address that will be used to receive all job applications. This is typically your company's HR or hiring manager. This email address will also be used as the "Reply To" destination if the applicant replies to the email message that they receive after a successful application.
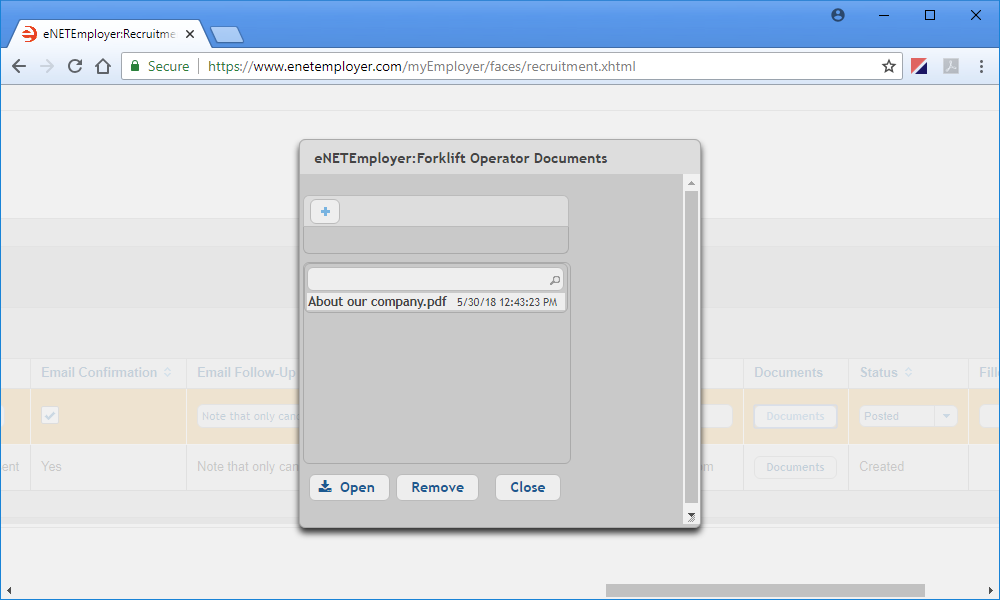
- If you wish to include documentation, instructions, notes or any other correspondence about this job posting, use the Documents button to upload the file(s). This can include PDFs, word processing documents, spreadsheets, images and so on. The documents attached here will only be visible by HR managers or other administrators who have privileges to edit the job posting - applicants will not see these documents. When you have added your documents, choose the Close button to exit the Documents window.
- Once you have completed each cell, choose the Save icon (the Check Mark icon at the left side of the row) to accept your changes. This action saves the changes for the row and takes you out of Edit Mode.
This completes the first step of adding a job posting. You are now ready to move to the next step where you will create the questionnaire that will be associated with this job posting.
See Also:
Posting a Job:
- Step 01 - Add a job posting to the Recruitment module
- Step 02 - Create a custom job questionnaire
- Step 03 - Post a job to your eNETEmployer recruitment webpage
- Step 04 - Link a job posting to your company website or an online location
- Posting jobs to your intranet for non-public viewing
Manage Job Applicants:
- Sort Applicants Based on their Score
- Review Applicant Submissions
- Assigning Applicants to other Positions
Optional Steps:


