Help Toolbar (select a button to browse other online help sections) Home Tutorials Resources Search Tabs & Menus Button Bar Table & Data Display |
Assigning Employee Accumulators Manually
For this tutorial, we will show you how to manually assign accumulators to your employees. Accumulators are the items that are used to collect or accrue amounts that will be used in various payroll calculations. Note: If you used an employee template to add your employees to the payroll and if the template included one or more accumulator items, then the corresponding accumulators will already be assigned to each employee.
Looking to assign employee accumulators using a template? If you wish to assign employee accumulators in an automated manner using an employee template, refer to the Assigning Employee Accumulators using a Template tutorial. |
NOTE: Click on the images below to view them at full size
Assigning Accumulators Manually
- From the Payroll tab, open the Employee - Accumulator Items screen. This screen allows you to assign accumulator records to the various employees in the payroll. You can use the various options in this screen to add and define accumulator settings for new employees or to review or change settings for existing employees.
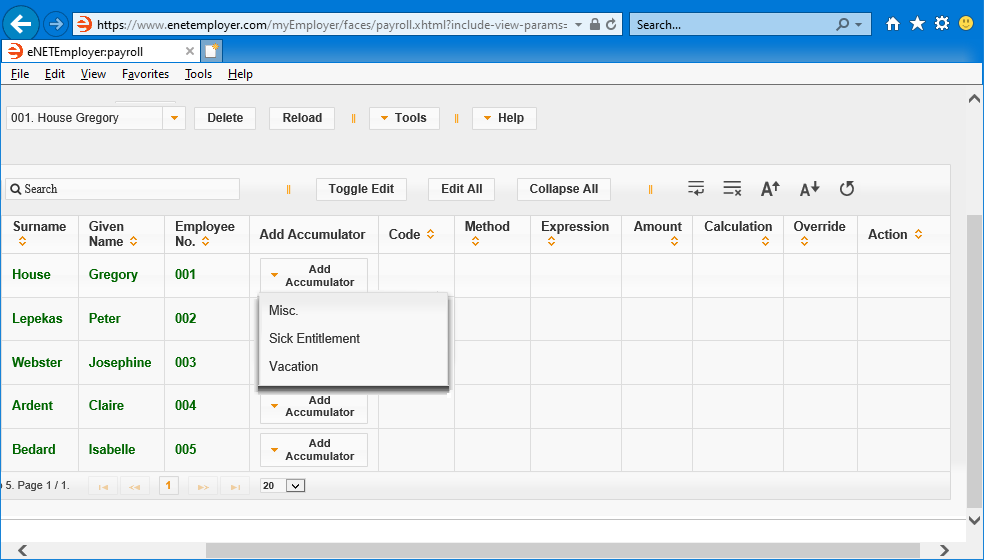
- Select the Add Accumulator button and then choose the desired item from the drop-down menu that appears. This action assigns the chosen accumulator to the current employee. Note: Accumulator items that appear in this list are created in the Current Payroll - Accumulators screen.
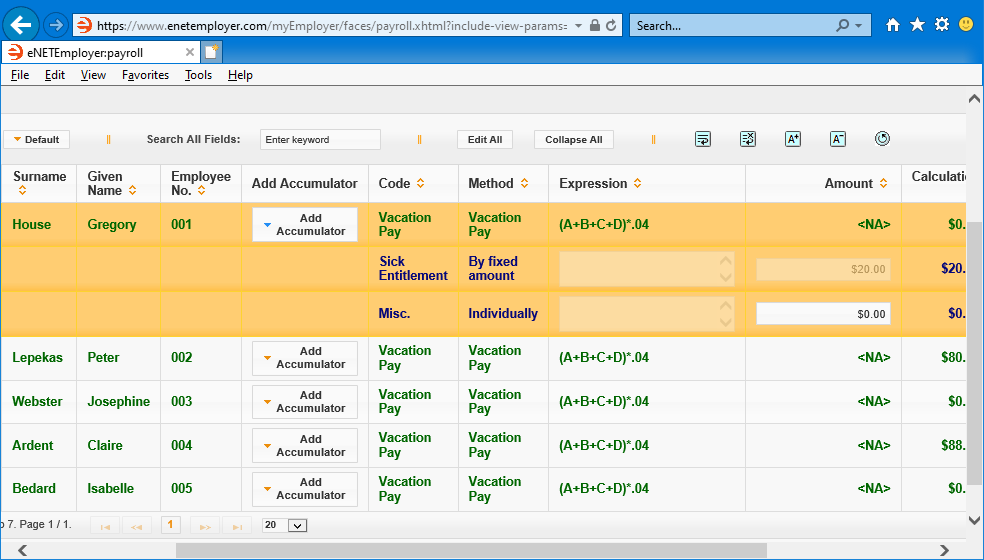
As you assign each item, you will notice a number of settings that will be used to calculate the amounts for each employee.
- Accumulators that are based on a Function will display the associated expression along with test values for your reference.
- Accumulators that are based on a Fixed Amount will display the set amount in the Amount cell.
- Accumulators that are to be calculated Individually will have the Amount cell active so that a custom amount can be defined for each employee.
- The top row for each employee is referred to as the Primary row and is displayed in Green text and each sub row appears in Black text. Note: If you cannot see the sub rows for each employee, choose the Expand icon (the right-facing triangle at the beginning of the row) - this will reveal the employee's sub rows.
- Repeat the preceding step to add additional accumulators as needed (press <F1> to use the Online Help system if you need to look up a definition for the various cells).
- Save all of the rows and sub rows when you are complete.
Accumulator Items Help Screen...
This completes the tutorial on adding accumulators manually.
Note: If you are working through the payroll setup process in order, you will need to continue through the Employee menu to finish entering the data that is required for each new payroll employee.
See Also

