Help Toolbar (select a button to browse other online help sections) Home Tutorials Resources Search Tabs & Menus Button Bar Table & Data Display |
Modifying Account Access
Administrators have the ability to enable or disable access to all user accounts that are associated with your eNETEmployer account. Account access can be changed for both administrative accounts (staff who actively manage the payroll), and self-service accounts (employees who have a self-service account for viewing their pay stubs and T4s). Note: You must have Administrative access in order to view and edit user accounts.
There are two parts to this tutorial:
NOTE: Click on an image below to view it at full size.
Part A - To Disable a User Account
- From the Employer tab, open the Admin - Users screen where you can see the user accounts that have been created for your employees.
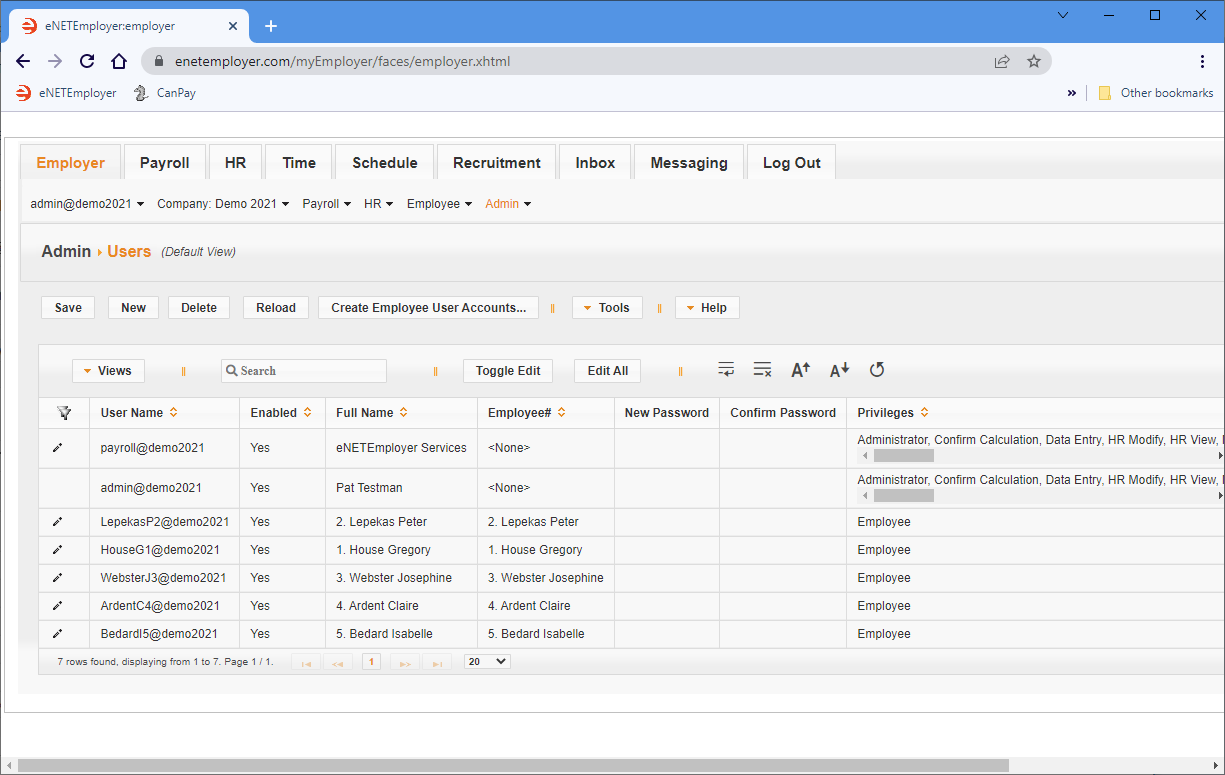
Example: In Fig. 01 below, we see two administrative accounts and 5 self-service accounts. All of the accounts are active as shown by the "Yes" designation in the Enabled column. - Double-click on the desired employee's row to activate Edit Mode, move to the Enabled column, and remove the check from the box.
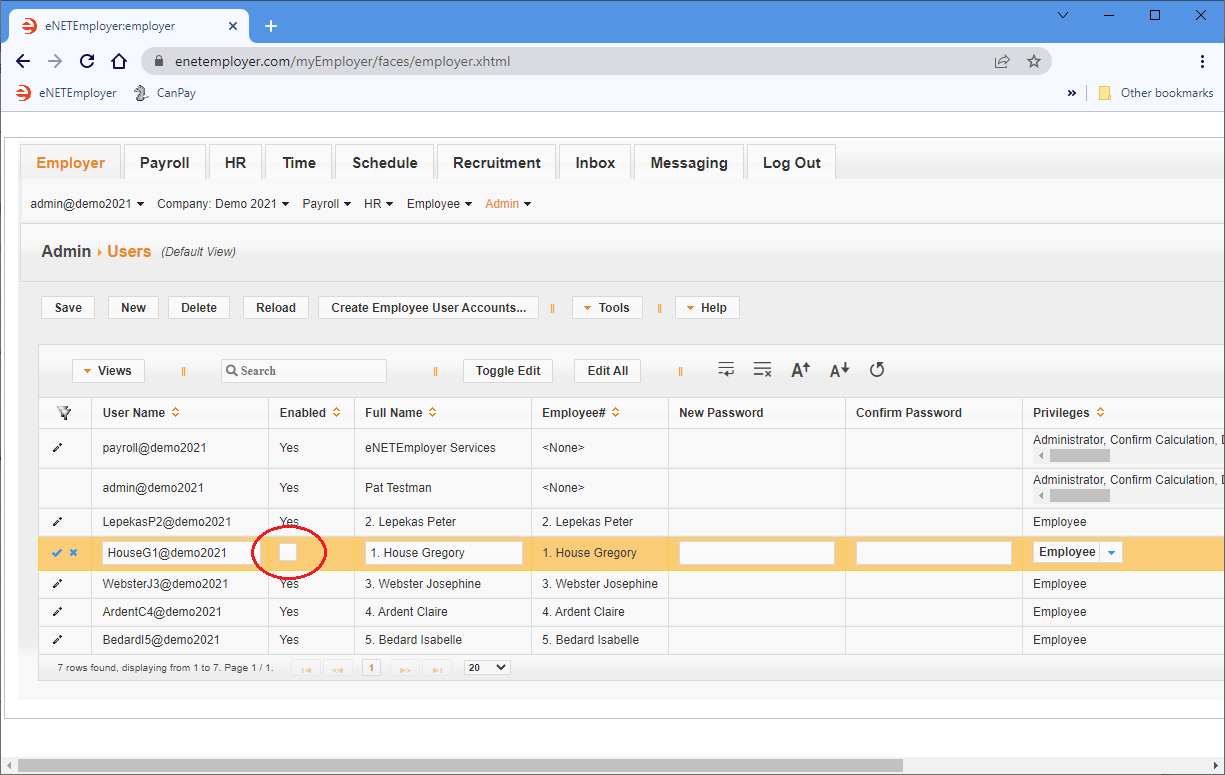
Example: In Fig. 02 below, We have disabled the employee's user account. - Once your changes are complete, choose the Save button (or the Pencil icon at the left side of the row) to save your changes.
The employee will no longer be able to log into eNETEmployer. If they attempt to do so, they will be presented with a pop-up message that states "Incorrect username/password combination".
Auto-Disable - User accounts are disabled automatically after 10 unsuccessful attempts. If this occurs, you can re-enable the account using the instructions in Part B of this tutorial.
We will now continue with the tutorial and learn how to enable a user account.
Part B - To Enable a User Account
- From the Employer tab, open the Admin - Users screen where you can see the user accounts that have been created for your employees.
- View the Enabled column to see the access status for your various accounts. A "Yes" designation means that the user can login to the program - a "No" designation means that the user cannot access the program.
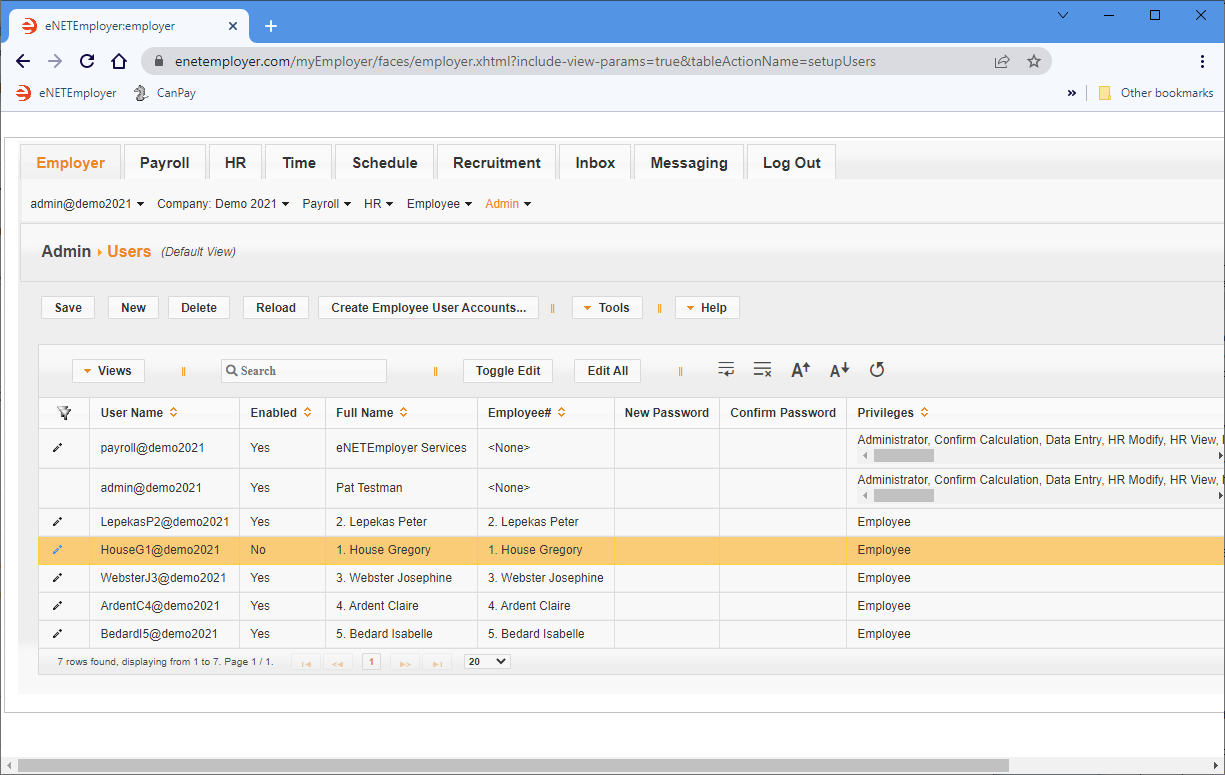
Example: In Fig. 03 below, we see one self-service user account with its access disabled. - Double-click on the desired employee's row to activate Edit Mode, then move to the Enabled column and place a check in the box.
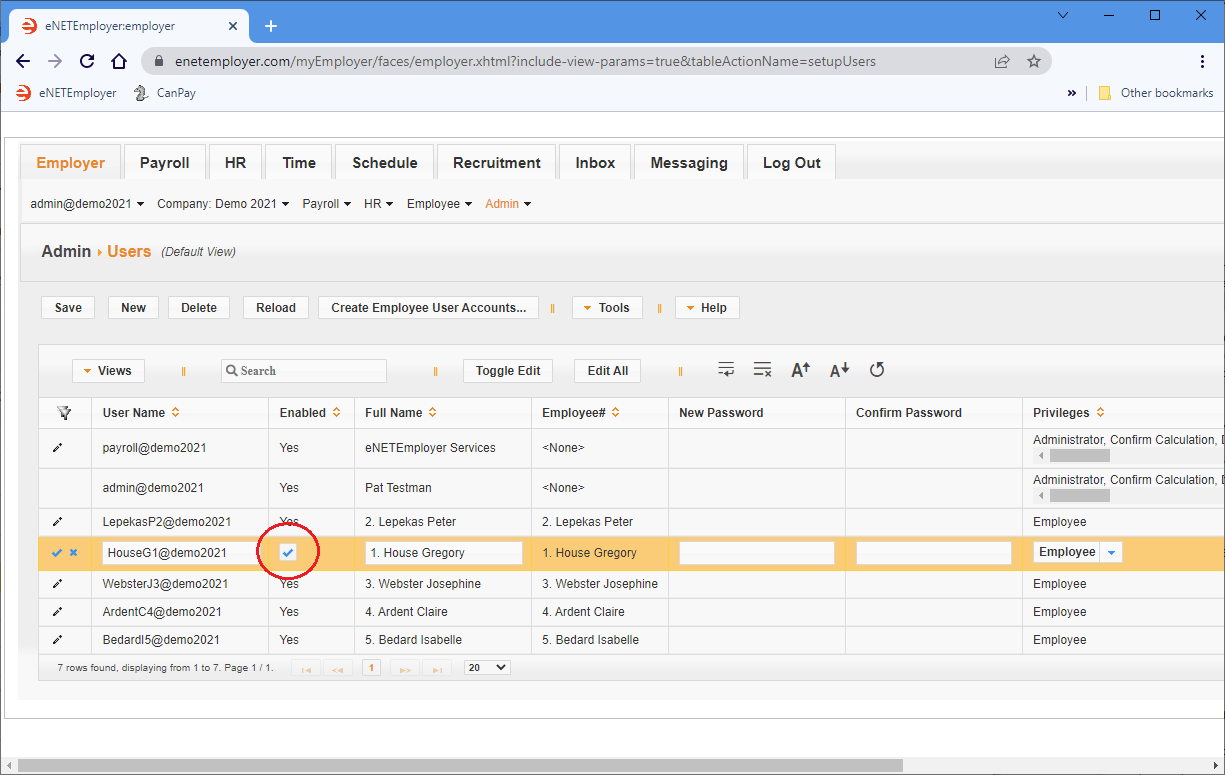
Example: In Fig. 04 below, We have enabled the employee's user account. - Once your changes are complete, choose the Save button (or the Pencil icon at the left side of the row) to save your changes.
The employee will now be able to log into eNETEmployer.
This completes the tutorial on how to enable and disable the access for user accounts.
See Also
For Employers:
- Creating a self-service user account for an Employee
- Creating self-service user accounts for multiple employees
- Resetting account passwords
- Modifying account access
- Approving year-end forms
For Employees:
- Viewing your pay statement
- Viewing your T4
- Viewing your T4A
- Viewing your RL1
- Editing your Personal Information


