Help Toolbar (select a button to browse other online help sections) Home Tutorials Resources Search Tabs & Menus Button Bar Table & Data Display |
Working with HR Training Quizzes
This tutorial will show you how to edit a training quiz. These could either one or your custom quizzes or one of the quizzes that are included with the eNETEmployer program. Edits can include modifications to the existing questions, or adding and removing questions entirely.
This tutorial has three parts:
Before you begin: - This tutorial assumes that you have added one or more training courses to your HR program via the Training Courses screen. If you have not yet added a training course, please view the Add an HR Training Course tutorial to learn how to do so before proceeding with this tutorial. |
NOTE: Click on the images below to view them at full size
Viewing the Training Quizzes:
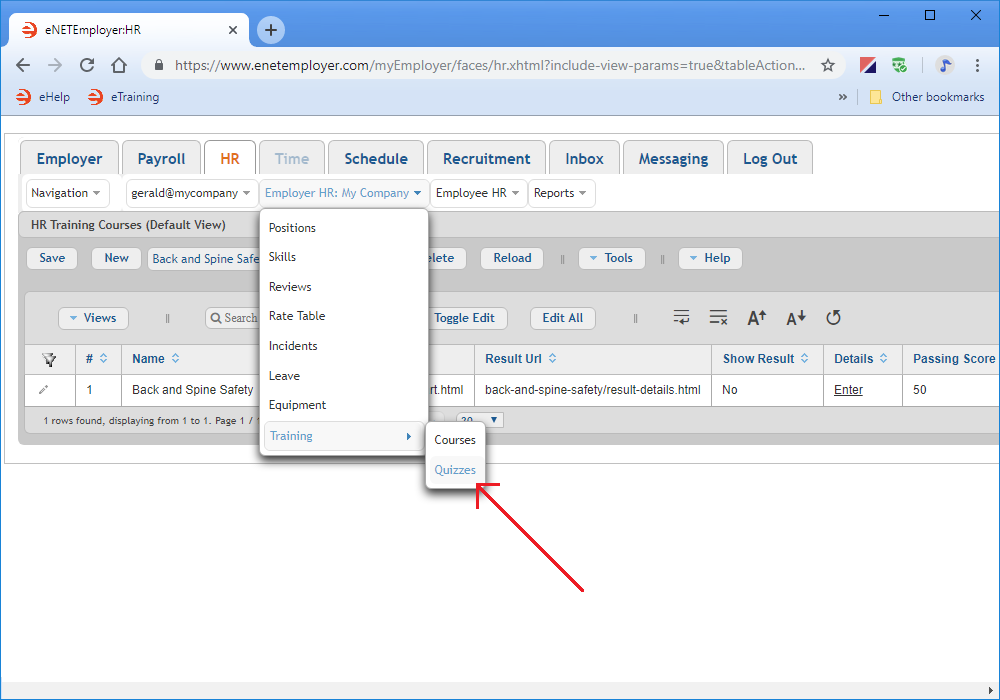
- Click on the HR tab and then choose the Employer HR menu to display the various options.
- Choose the Training - Courses menu option. This opens the HR Training Quizzes screen where you can work with the pre-formatted course that are provided with the HR module.
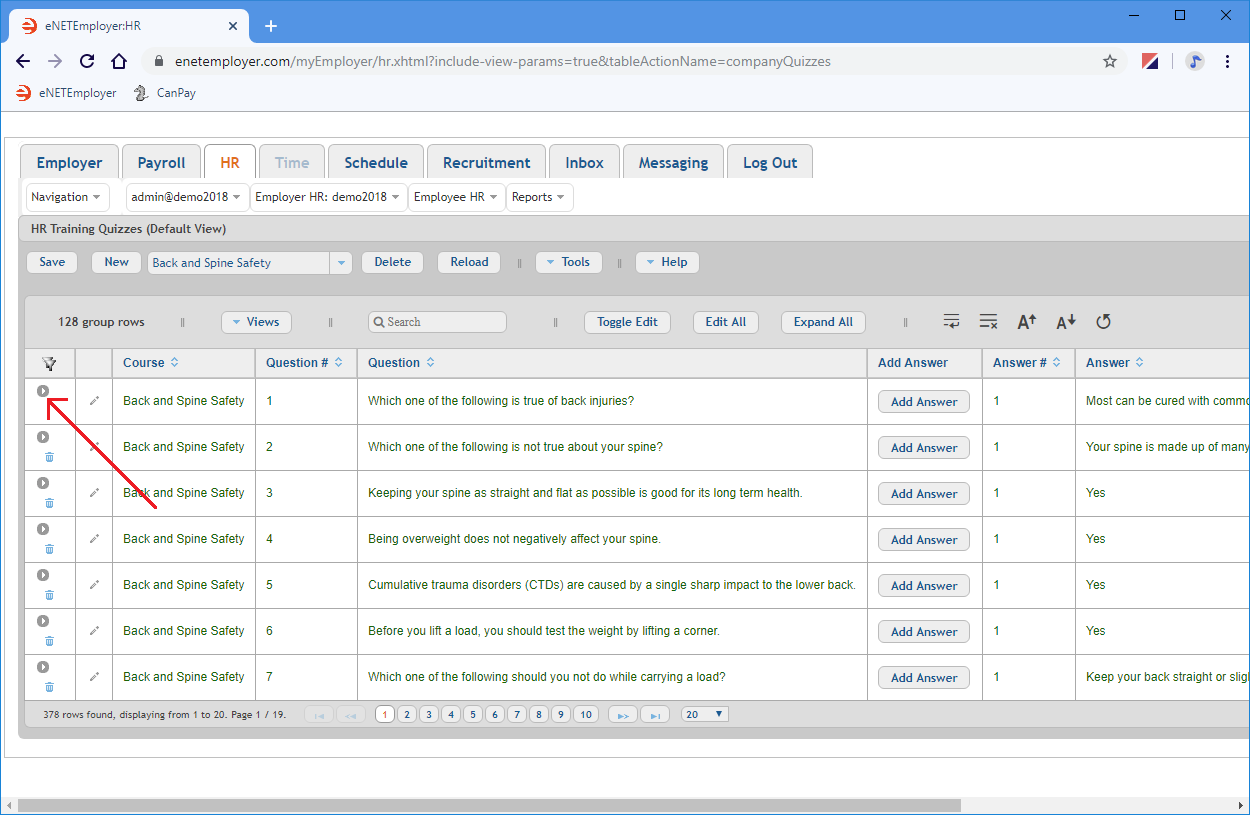
- Click on the first row's Expand icon (the right-facing arrow that is located at the left side of the row). This displays the sub rows that are associated with the main row for question number 1.
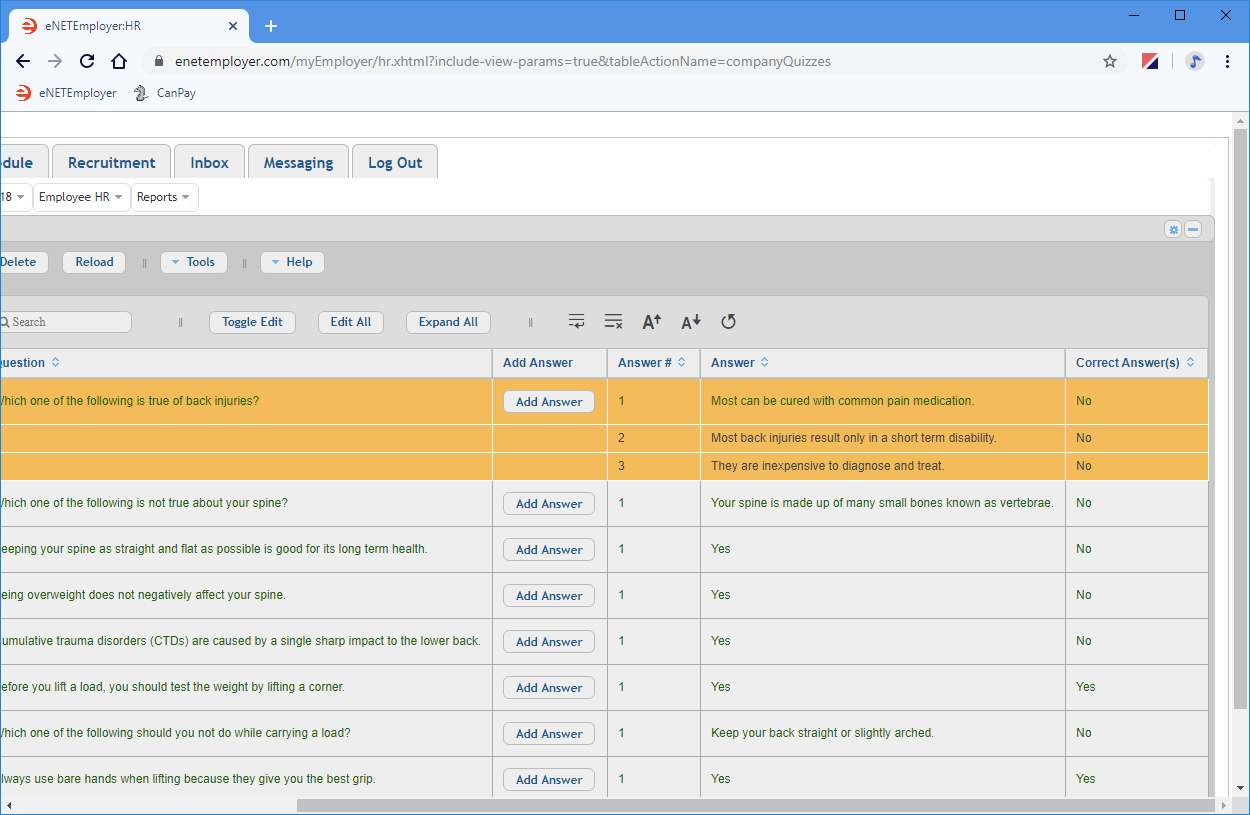
- Scroll to the right if necessary so that you can view the answer-related columns for the current row.
HR Training Quizzes Help page...
If you are continuing from the Adding an HR Course tutorial, you will see a number of question rows that correspond to the samples courses that were discussed in the tutorial. You may also see any number of your own quiz if you have created one.
Each row in the table represents an individual question. Some questions require a True/False answer, while others require a multiple choice response. The rows are collapsed by default, so let's learn how to expand the rows so that you can see the various options for each question.
Empty Table? - If no quizzes appear in the table, then you must first visit the Training Courses screen to add a training course to the HR module. Only then can eNETEmployer automatically add the corresponding quiz to the current screen. |
Now that you have reviewed the pre-formatted quizzes, let's move to the next section and learn how to customize the quiz for your employees.
To Edit a Training Quiz:
Some clients prefer to modify the pre-formatted quizzes by changing various answers, thus creating a custom quiz. This can be accomplished easily by editing the text of any question. The following section will show you how to edit a question, and how to add a new answer to the current question.
- Double-click on the row you wish to change - this activates Edit Mode (you can also right-click on the row and choose the Edit - Toggle Edit command to perform the same action).
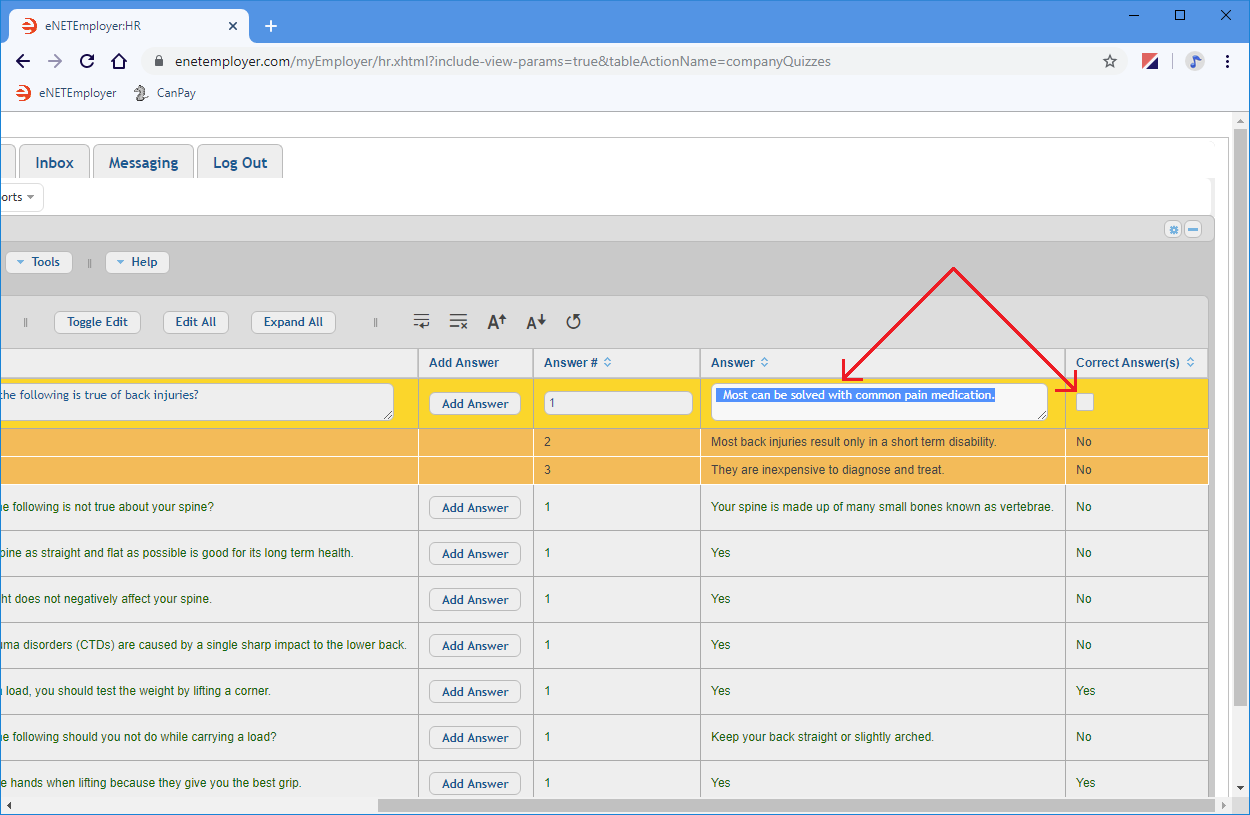
- Move to the Answer column and edit the cell's text as needed. This can involve typing a new question entirely, or changing the text to make the quiz more challenging.
- If your new answer is to be designated as the correct one, then move to the Correct Answer box and ensure that a check appears in its checkbox (conversely, remove the check from the box of the answer that is to be designated as "incorrect").
Example: Before we made our changes in the Fig. 04 example below, the first row's answer was designated as the correct one. As shown, we updated the first row with two important changes: 1) We replaced the correct answer: "They can cause you great pain.", with the following incorrect answer: "Most can be cured with common pain medication". 2) We removed the check from the Correct Answer checkbox so that our revised answer will no longer be accepted as correct.
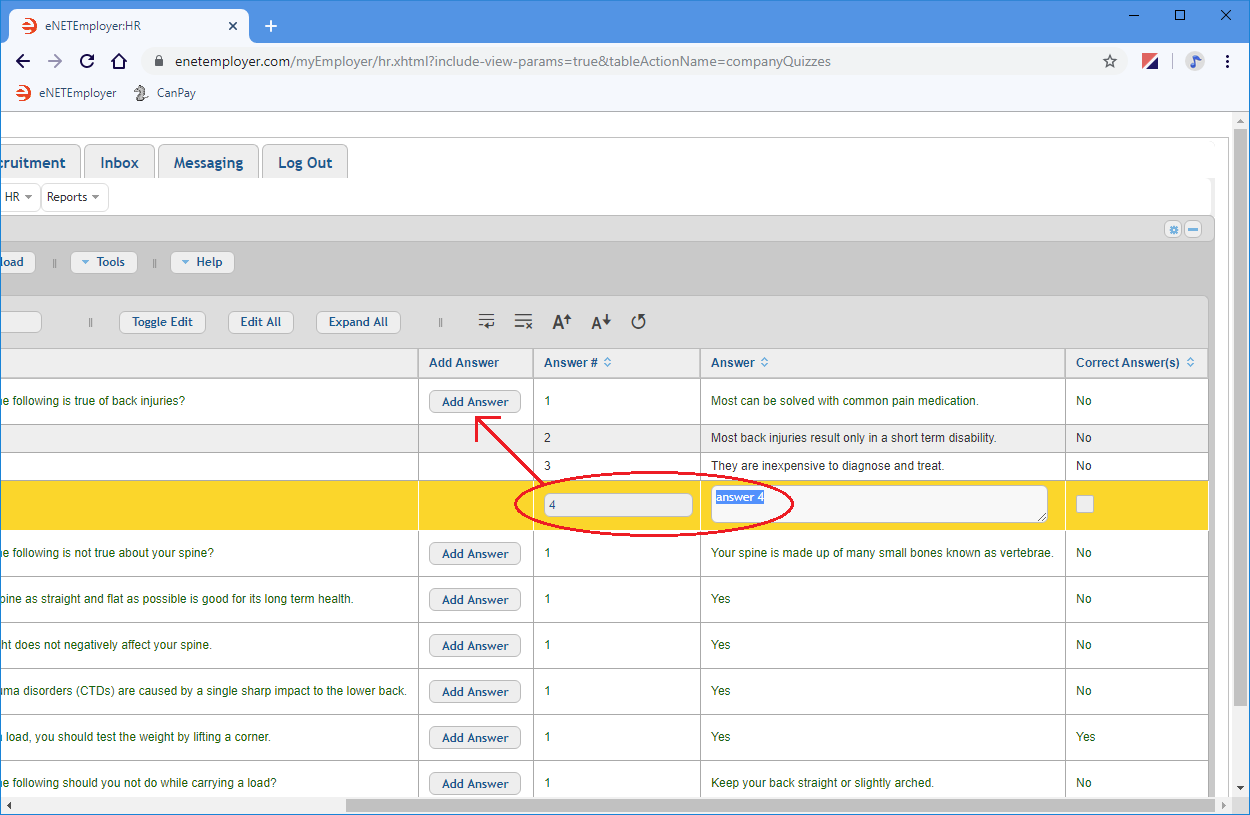
- Select the Add Answer button for the current row. This adds a new sub row to the table with the cells ready for editing.
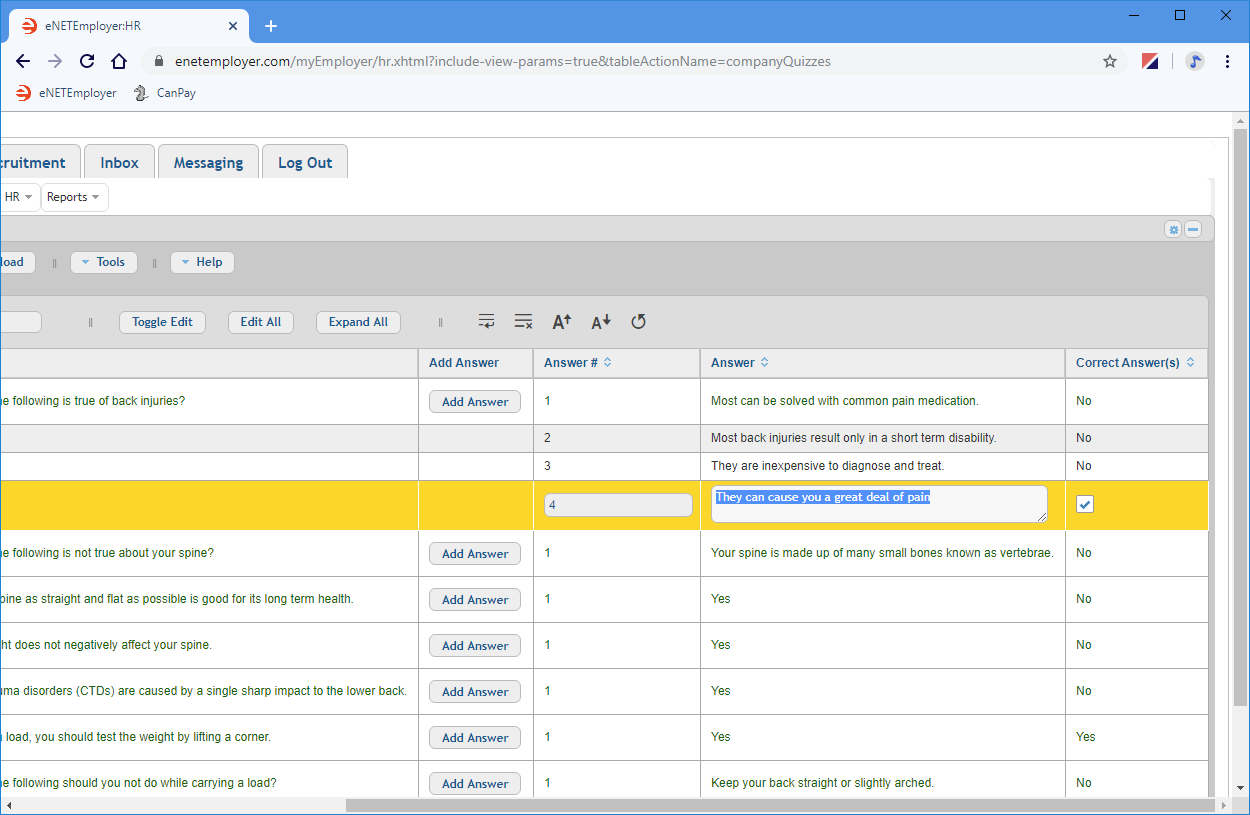
- Move to the Answer column and enter the text for the new answer. In our example, we will enter the text for a "correct" answer as follows: "They can cause you a great deal of pain".
- Move to the Correct Answer cell and place a check in the checkbox.
- Choose the Save icon (the Check Mark icon at the left side of the row) to accept your changes. This action saves the changes for the row and takes you out of Edit Mode.
Now that you know how to edit a quiz, let's complete the tutorial and learn how to adjust the display so that you see only the current quiz with which you are working (instead of many rows with other quizzes).
Now that our example does not have any correct answers, we will add a fourth answer to the question and designate the new answer as the correct one.
To Filter the Quizzes:
If you have added more than one training course for your employees, you will notice that the HR Quizzes screen has many rows of data to sort through. If you need to work with a single course and wish to temporarily "hide" the rows for other courses, you can do so easily using the Filter feature.
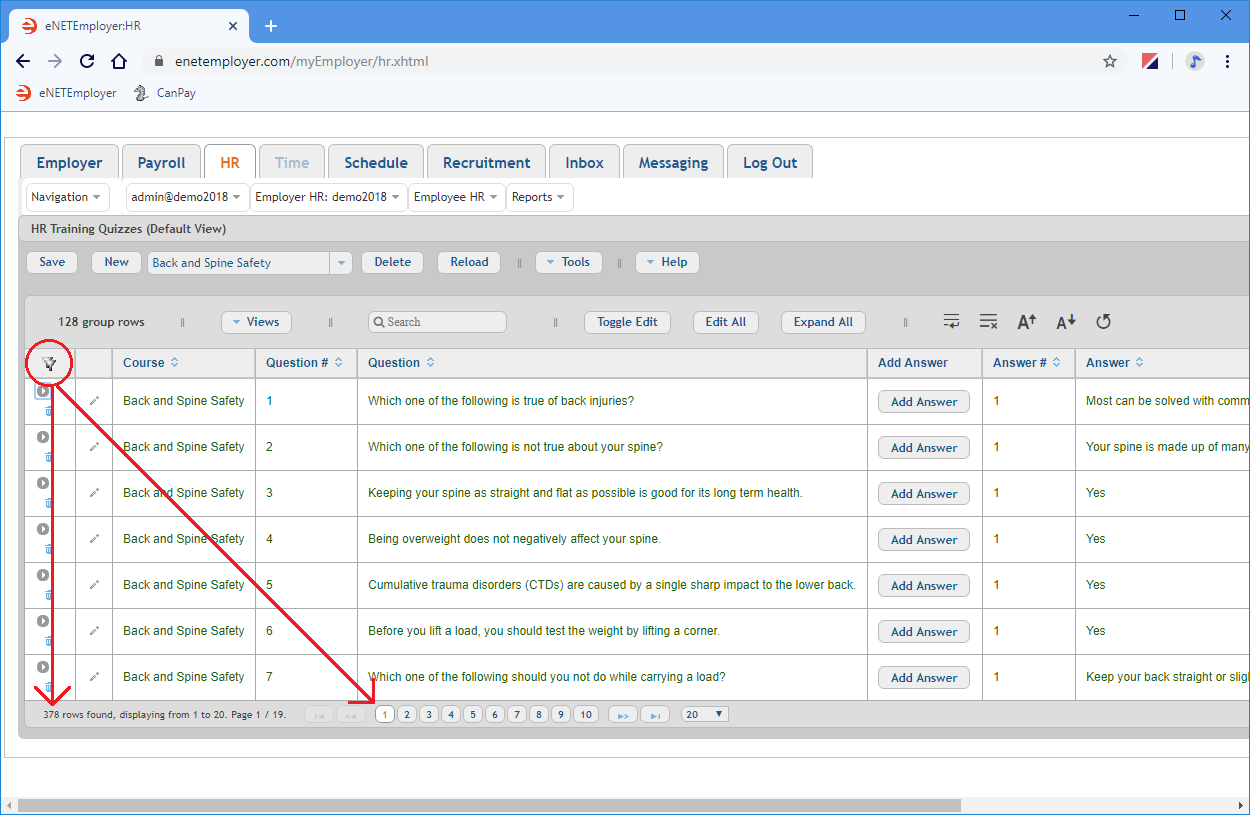
- Move to the bottom of the table and take note of how many rows are being displayed in the Row Display section.
Example: In Fig. 07 below, we see that there are more than 10 pages of collapsed rows available for us to view (378 rows in total if they were uncollapsed), based on our current settings that show only 20 rows per page.
- Choose the Filter icon (the Grey funnels
 located at the top left of the row) to activate the Filtering feature for the table. Choosing this icon adds an editable Filter field to the top of each row header in the table.
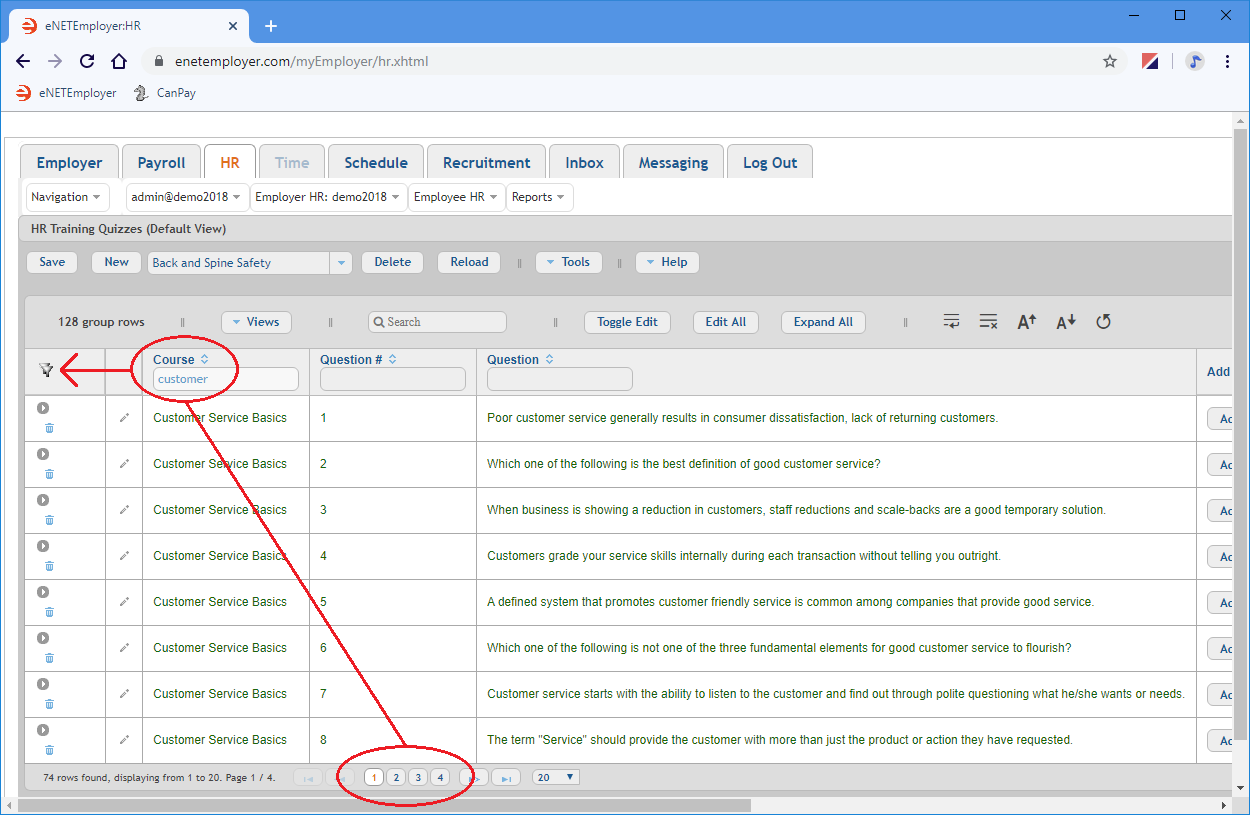
 - When the editable fields appear above each column, move to the Course column and type the first word of the desired course name for which rows you wish to view. As you type your word into the field, the table will change to show only those rows that contains the characters that you type.
Example: In Fig. 08 below, we typed the word "customer" into the Filter field for the Course column, and the filter operation updates to show only those rows that contain this word in the course name. This is further indicated by the Row Display section at the bottom of the table that has been reduced from 10+ pages of available rows, to only 4 pages. - Choose the Save icon (the Check Mark icon at the left side of the row) to accept your changes. This action saves the changes for the row and takes you out of Edit Mode.
This completes the tutorial on editing HR training quizzes. To learn how to assign these training quizzes to your individual employees, refer to the Assigning Training Courses tutorial.
See Also:
