Help Toolbar (select a button to browse other online help sections) Home Tutorials Resources Search Tabs & Menus Button Bar Table & Data Display |
Entering Your Payroll's Business Account
This tutorial will show you how to enter your company's business number (BN) for use with the current payroll. The Canada Revenue Agency (CRA) requires each business to have at least one BN (though not all businesses require a business number, most employers will need a payroll program account at the very least). You should enter this number before you process your payroll.
NOTE: Click on the images below to view them at full size
To enter your business account information:
- From the Payroll tab, open the Current Payroll - Business Accounts screen. If your business has more than one account, this screen can be used to enter each one as needed. For example, you could have one account at the regular rate for EI premiums that are deducted from each employee's insurable earnings, and a second account that is set at a lower rate if you provide your employees with a short-term disability plan.
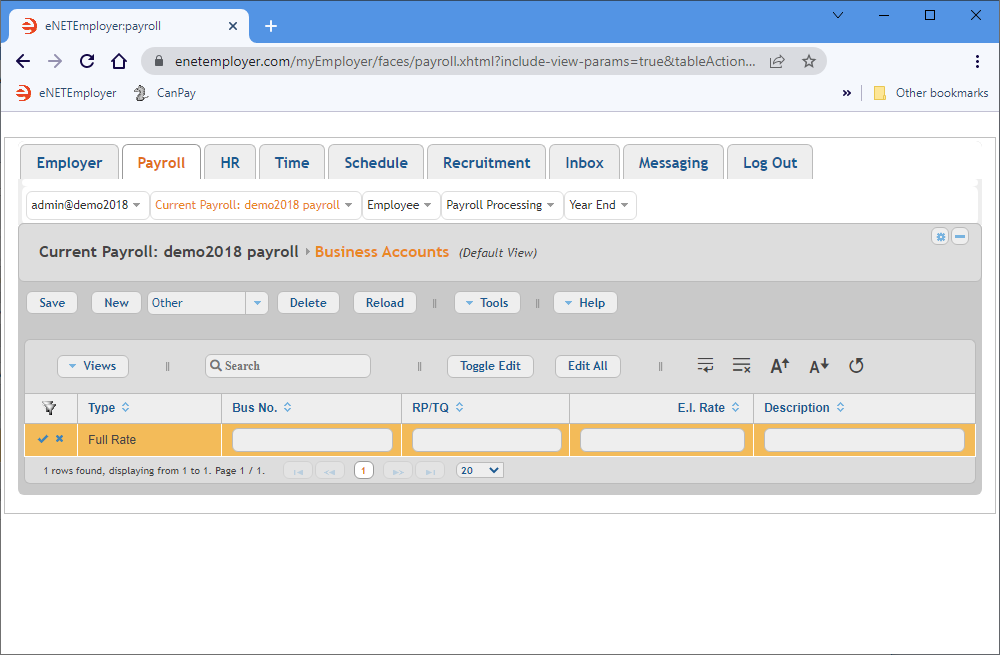
- Use the drop-down list immediately to the right of the New button to choose the account type you wish to add, and then click the New button to insert an account row in the table. The row appears with Edit Mode activated.
- Edit the various cells as they relate to your payroll (press <F1> to use the Online Help system if you need to look up a definition for the various cells).
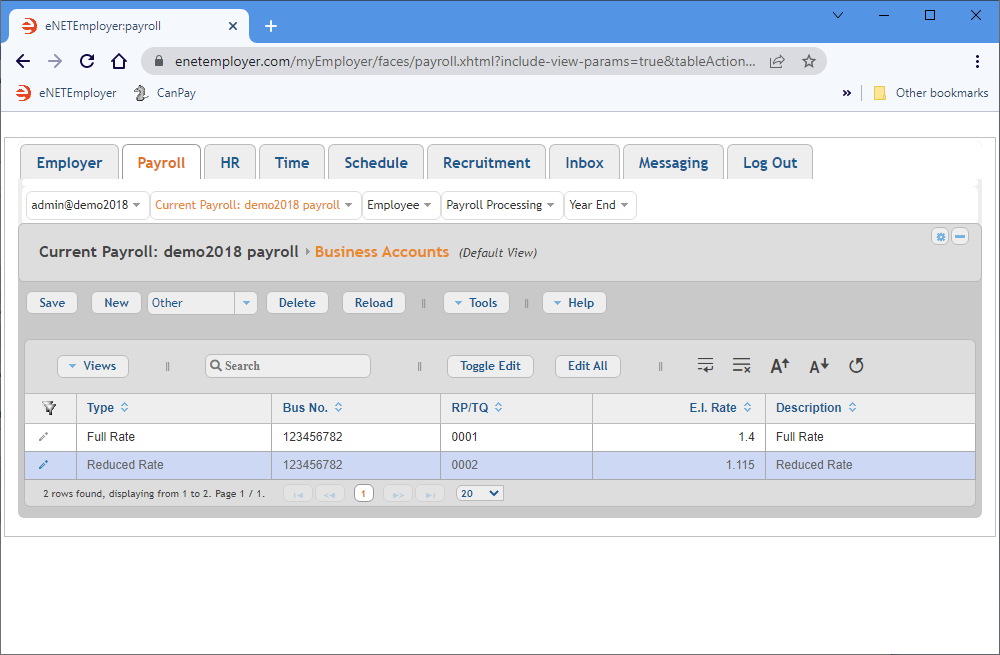
Example: Using the sample data shown in the table below, we have created two accounts; one at the Manitoba Full Rate of 1.4, and a second Manitoba Reduced Rate account at 1.115.
Type Bus. No. RP EI Rate Description Full Rate 123456782 0001 1.4 Full Rate Reduced Rate 123456782 0002 1.115 Reduced Rate  Fig. 02: The Business Accounts screen with completed sample data.
 - Once your data is complete, select the Save icon (the check mark icon at the left side of the row). This accepts the changes and the Edit Mode icons are removed to indicate that the entire row has been saved. You can also choose the Save button from the Button Bar above the table.
- If your business has more than one account, use the New button to add another account type along with its pertinent information (remembering to save each row's information when you are complete).
This completes the tutorial on entering your company's business account information.
Note: If you are working through the payroll setup process in order, you will need to continue through the Current Payroll menu to finish entering the data that is required for your particular payroll.
Business Accounts Help page...
See Also:
