Help Toolbar (select a button to browse other online help sections) Home Tutorials Resources Search Tabs & Menus Button Bar Table & Data Display |
Working with Deleted Messages
This tutorial will show you how to work messages that have been removed from the various Messaging mailboxes. This can include viewing the content of deleted message and/or moving them to other mailboxes to avoid permanent removal.
There are two parts to this tutorial:
NOTE: Click on the images below to view them at full size
To View a Deleted Message:
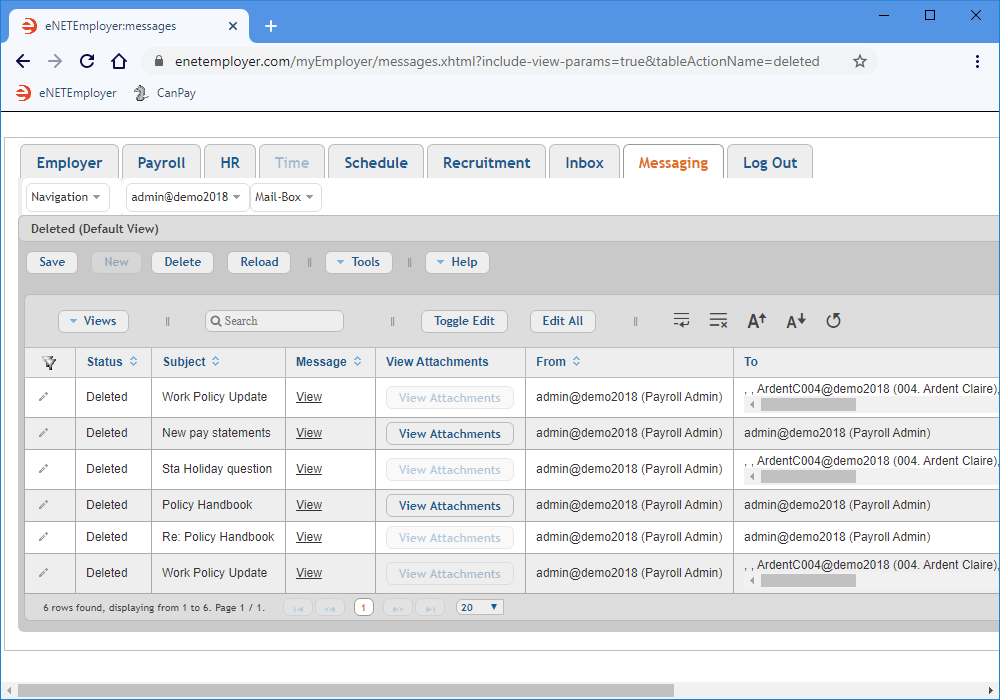
- Select the Messaging tab, and then choose the Mailbox - Deleted menu option. This opens the Deleted screen where you can view messages that have removed from other Messaging mailboxes.
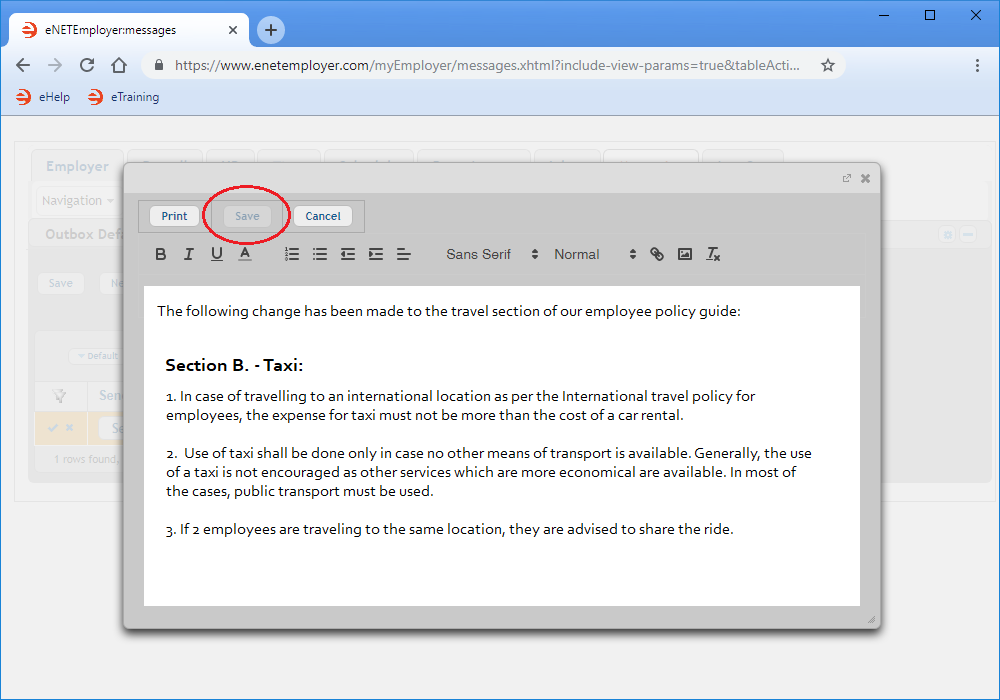
- To view the historical content of a message, move to the Message column and select the View hyperlink. This displays a window where you can view the original message body.
Example: In Fig. 02 below, we see the body text from a previously sent message. You will notice that the Save button is unavailable so that the original message's content cannot be altered.
- Select the Cancel button when you are finished reviewing the original message's text. This returns you to the Outbox screen.
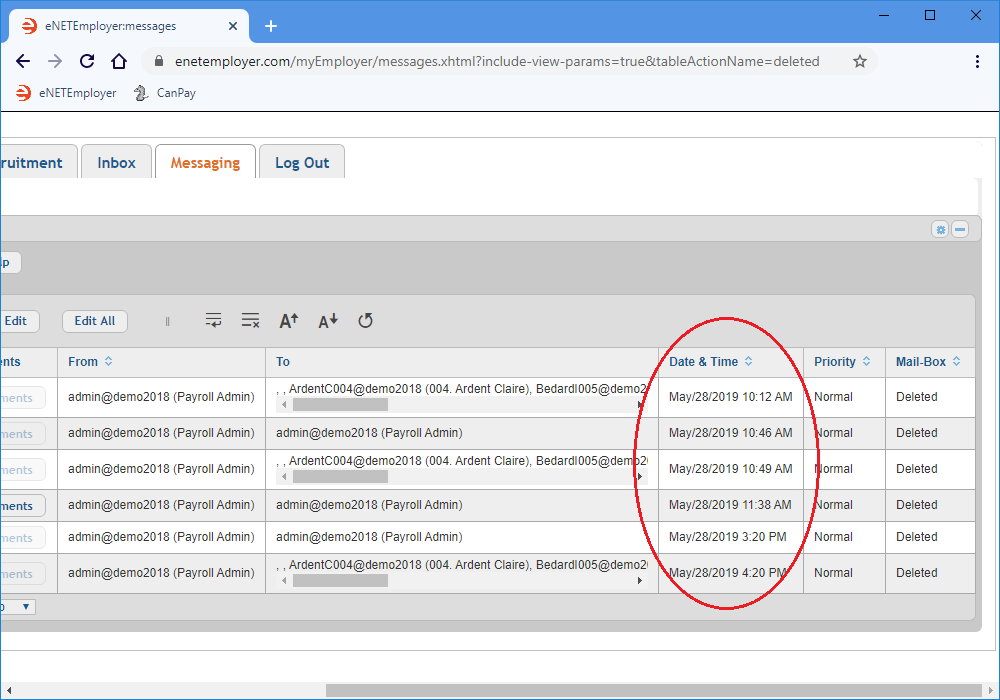
- To view the date and time that an original message was sent, move to the Date & Time column. Each message displays the date that the message was sent, along with a time stamp.
Example: In Fig. 03 below, we see that two attachments are included with our message.
Example: In Fig. 01 below, we see the Deleted screen with messages that have been removed (deleted) from other Messaging screens. The Status column for each of these messages designates them as "Deleted".
Now that you know how to review the content of a deleted message, let's learn how to move a message out of the Deleted mailbox to avoid its permanent removal.
To Restore a Deleted Message:
- Double-click on a row to activated the cells for editing (you can also choose the Pencil icon at the left side of the row perform this action).
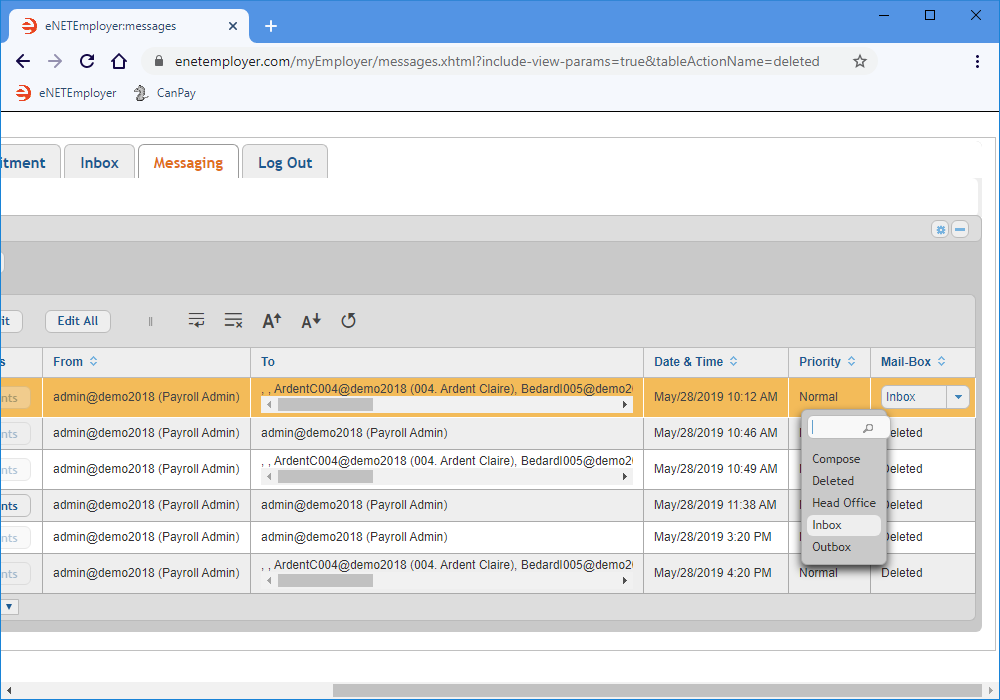
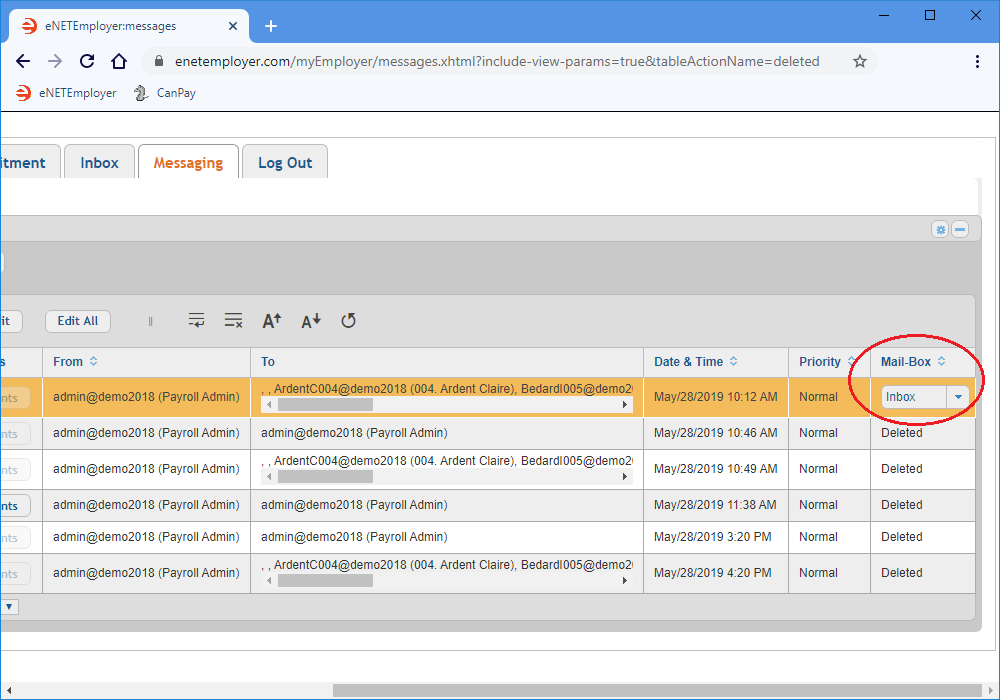
- Move to the Mailbox column for the edited row, and then click on the downward arrow. This displays a list of the available mailboxes.
Example: In Fig. 04 below, we see the drop-down list with various mailboxes to which the deleted message can be moved. - Select the desired destination mailbox for the message. This closes the drop-down list and displays the target mailbox in the cell.
Example: In Fig. 05 below, we see chose the Outbox folder - a location where the restored message will be moved.
- Choose the Save button to store your changes. The message is immediately removed from the screen and stored in the mailbox that you selected.
This completes the tutorial on working with deleted messages.
See Also:
